
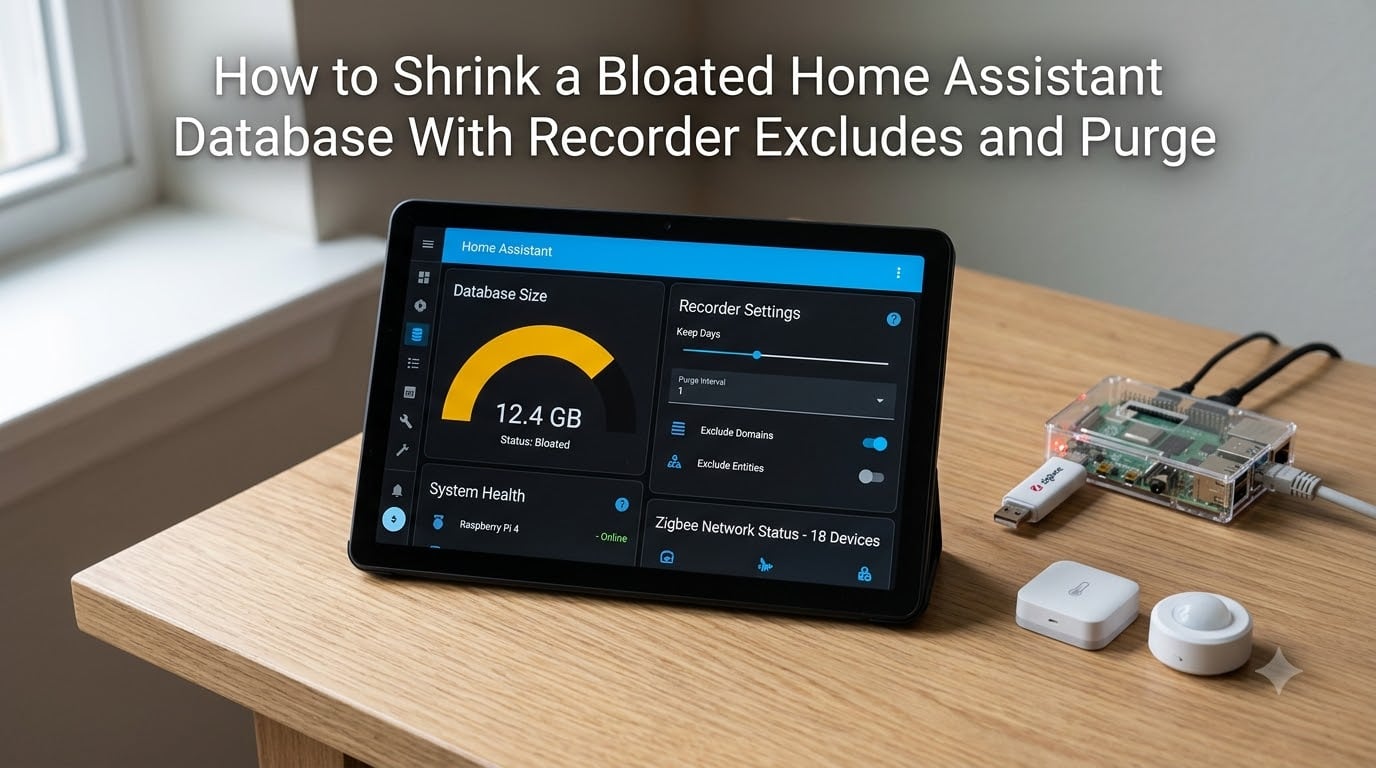
Your Home Assistant installation has been running for a few months, and suddenly things feel sluggish. The history page takes forever to load. Your backups are growing larger every week. You check the filesystem and discover that home-assistant_v2.db has ballooned to several gigabytes. Sound familiar?
Database bloat is one of the most common performance problems in Home Assistant, and it affects everything from history page speed to backup reliability. The good news is that the fix is straightforward once you understand how the recorder integration works.
By default, Home Assistant records every single state change for every entity into a SQLite database. Without any filtering, high-frequency sensors like power meters, device trackers, and signal-strength sensors flood the database with thousands of rows per hour. Over weeks and months, this data accumulates into a massive file that slows down queries, inflates backups, increases SD card wear, and raises the risk of corruption during power loss.
In this guide, I will walk you through how to shrink a bloated Home Assistant database with recorder excludes and purge. We will cover everything from finding the worst offenders to running a purge with repack that actually reclaims disk space. I will also address the most common fears, like whether purging will destroy your Energy Dashboard data, and share real-world case studies where users reduced databases from 95GB to 12GB and from 4GB to under 200MB.
Table of Contents
Quick Answer: How to Shrink a Bloated Home Assistant Database?
To shrink a bloated Home Assistant database, you need to do four things: check the current file size, identify which entities are consuming the most space, add recorder excludes for noisy entities in configuration.yaml, and run a purge with repack through the Developer Tools Actions menu. The recorder exclude stops new bloat from accumulating, and the purge with repack removes old data and physically shrinks the database file on disk.
Here is the 4-step process in a nutshell:
Check your database size by locating home-assistant_v2.db in your config directory or using a filesize sensor.
Find the top space-consuming entities using an SQL query in the SQLite Web add-on.
Add recorder excludes in configuration.yaml using domains, entity_globs, or specific entity_ids to stop recording junk data.
Run recorder.purge with repack via Developer Tools > Actions to delete old records and reclaim disk space.
After completing these steps, most users see a 70 to 90 percent reduction in database size. One community member reduced a 4GB database to just 200MB by excluding media players and device trackers. Another user took a 95GB database down to 12GB using purge combined with VACUUM INTO.
Step 1: Check Your Current Database Size
Before changing anything, you need to know how big your database has become and whether it is actually bloated. The database file is called home-assistant_v2.db, and it lives in your Home Assistant configuration directory alongside configuration.yaml.
What counts as a healthy database size? For a typical setup with 10 days of retention and reasonable excludes, the database should sit between 200MB and 1GB. If you are seeing 2GB or more, and especially if the file is growing by hundreds of megabytes per week, you have a bloat problem that needs attention.
There are three common ways to check the file size:
Option A: File System Browser
If you have access to your Home Assistant file system through an add-on like Samba, SSH, or the File Editor, navigate to your config directory and look at the size of home-assistant_v2.db. You may also see two companion files: home-assistant_v2.db-wal and home-assistant_v2.db-shm. These are the WAL (Write-Ahead Log) and shared memory files, and they can also grow large. We will deal with those in the troubleshooting section.
Option B: Filesize Sensor in Home Assistant
You can create a sensor that monitors the database file size and displays it directly in your Lovelace dashboard. Add this to your configuration.yaml:
sensor:
  - platform: filesize
    file_paths:
      - /config/home-assistant_v2.db
This creates a sensor.home_assistant_v2_db entity that updates periodically with the current file size. Keep in mind that this sensor itself writes to the database, so it is a bit of a catch-22 for monitoring. The footprint is tiny compared to the bloat you are tracking, so do not worry about it.
Option C: DbStats or SQLite Web Add-on
The DbStats add-on gives you a quick summary of database health, including total size and table breakdown. The SQLite Web add-on is more powerful because it lets you run SQL queries directly against the database, which is what we need for the next step. I recommend installing SQLite Web now since we will use it to identify bloated entities.
Both add-ons are available in the Home Assistant Community Store (HACS) or the official add-on repository. Once installed, they provide a web interface for database inspection without needing SSH access.
Step 2: Find the Entities Eating the Most Space
Now that you know your database is bloated, you need to figure out which entities are responsible. This is where many beginners get nervous, but the SQL query is simple and safe to run. You are only reading data, not modifying anything.
Open the SQLite Web add-on and run the following query. This query counts the number of state changes recorded for each entity and sorts them from highest to lowest:
SELECT entity_id, COUNT(*) as count
FROM states
GROUP BY entity_id
ORDER BY count DESC
LIMIT 20;
The results will show you the top 20 entities by number of recorded state changes. In most cases, the worst offenders are power meters, device trackers, linkquality sensors, signal-strength sensors, and media players. These entities can change state dozens or hundreds of times per hour, and each change creates a new row in the states table.
One community member ran this query on their 95GB database and discovered that the STATE_ATTRIBUTES table accounted for 83 percent of the total database size. The biggest contributors were power meter sensors and device trackers that updated every few seconds. Once they identified the problem entities, they were able to exclude them and dramatically reduce the database footprint.
If you want to go deeper, you can also check which database tables are the largest. This query uses the SQLite dbstat virtual table to show table sizes:
SELECT name, SUM(pgsize) as size
FROM dbstat
GROUP BY name
ORDER BY size DESC
LIMIT 10;
For expert-level analysis, the sqlite3_analyzer tool provides a detailed breakdown including overflow pages, which indicate that data is spilling beyond the main B-tree structure. This level of analysis is rarely needed, but it is useful if you are debugging a stubbornly large database that refuses to shrink.
Write down the entity_ids of your top offenders. You will need them for the next step.
Step 3: Configure Recorder Excludes
This is the most important step. Recorder excludes tell Home Assistant to stop recording state changes for specific entities, domains, or patterns. Once configured, new data from those entities will no longer be written to the database, which prevents future bloat.
You configure excludes in your configuration.yaml file under the recorder key. There are three ways to exclude entities: by domain, by entity_globs (wildcard patterns), and by individual entity_id.
Domain-Level Excludes
Domain excludes remove entire categories of entities. This is the most aggressive option because it stops recording for every entity in that domain. Common domains to exclude include:
automation– rarely useful to keep history of automation triggersscript– same as automation, the state is just “triggered” brieflysensor– be careful here, as this excludes ALL sensors (use entity_globs instead for specific ones)zone– zone state changes are rarely needed in historypersistent_notification– no need to record thesetimerandcounter– state changes are high-frequency and low-value
Entity_Globs Excludes (Wildcards)
Entity_globs let you use wildcard patterns to exclude specific types of sensors without blocking an entire domain. This is the recommended approach for most users because it is precise and flexible. Here are common patterns that target known bloat sources:
sensor.*_linkquality– Zigbee link quality sensors that update constantlysensor.*_signal_strength– WiFi signal sensors, same problemsensor.*_power– power meter readings, often the #1 space consumersensor.*_voltage– voltage readings, same high-frequency issuesensor.*_energy– cumulative energy readingsdevice_tracker.*– presence sensors, especially GPS-based onessensor.*_uptime– device uptime counters, change frequentlymedia_player.*– media player state changes are very chatty
Entity-Level Excludes
For specific entities that do not fit a pattern, you can list them individually. Use this for one-off sensors that generate excessive data.
Example Recorder Configuration
Here is a practical configuration.yaml recorder block that addresses the most common bloat sources:
recorder:
  purge_keep_days: 10
  commit_interval: 30
  exclude:
    domains:
      - automation
      - script
      - zone
      - persistent_notification
      - timer
      - counter
    entity_globs:
      - sensor.*_linkquality
      - sensor.*_signal_strength
      - sensor.*_power
      - sensor.*_voltage
      - sensor.*_uptime
      - media_player.*
      - device_tracker.*
    entities:
      - sensor.last_boot
      - sensor.date
After saving this configuration, restart Home Assistant. From that point forward, excluded entities will no longer write to the database. The exclusion only affects new data going forward. It does not retroactively delete old records for those entities. To remove the historical data already stored, you need to run a purge, which we will cover in Step 4.
Which Entities to Exclude vs Keep: Quick Reference
Here is a quick reference table to help you decide what to exclude and what to keep:
Exclude (high bloat, low value): linkquality sensors, signal strength sensors, uptime sensors, media player states, device tracker presence spam, power readings (if you have long-term statistics), voltage sensors, automation and script states, timer and counter states.
Keep (moderate bloat, high value): temperature sensors, humidity sensors, door and window sensors (binary_sensor), motion sensors, switch states, light states, climate setpoints.
Always keep: long-term statistics entities (these are stored separately), alarm panel states, lock states, any entity you actively use in history or logbook dashboards.
Exclude vs Include: Which Approach Should You Use?
Home Assistant supports two filtering approaches for the recorder: exclude (record everything except what is listed) and include (record nothing except what is listed). The exclude approach is the default and works well for most users because you start with full coverage and trim the fat. The include approach is better for power users with a very large number of entities who only want to record a specific set.
I recommend starting with excludes. If you find that your database is still too large after excluding the common offenders, you can switch to an include-based approach. With includes, you would specify only the domains and entities you want to record, and everything else gets ignored. This gives you maximum control but requires more upfront configuration.
One important note for users who want to keep on/off history for switches and lights but not their attribute bloat: you can create a template binary_sensor that mirrors the switch state. Then exclude the original switch entity from the recorder and keep only the binary sensor. This preserves the on/off timeline while eliminating the heavy attribute data.
Step 4: Purge With Repack to Reclaim Disk Space
Excluding entities stops new bloat, but your existing database file is still large. To actually shrink it, you need to purge old data and then repack the database. This two-step process is where many users get stuck, so let me walk through it carefully.
How to Run the Purge Action
In newer versions of Home Assistant, the Developer Tools section has been reorganized. The purge service is now found under Developer Tools > Actions (formerly called Services). If you cannot find Developer Tools in the old sidebar location, it may be under Settings > Devices and Services depending on your HA version.
Follow these steps to purge the database:
Go to Developer Tools > Actions in the Home Assistant sidebar.
Search for
recorder.purgein the action search box.Click on the action to open its configuration panel.
Set
keep_daysto the number of days you want to retain (matching your purge_keep_days setting, e.g., 10).Set
repack: trueto physically reclaim disk space after purging.Click Call Action to execute the purge.
The repack option is absolutely critical. Without it, purge deletes rows from the database but the file size on disk does not change. SQLite does not automatically release freed space back to the filesystem. The repack step rewrites the database file to compact it and release the unused space.
What Is the Difference Between Purge and Repack?
Purge deletes old rows from the states, state_attributes, events, and related tables based on your keep_days parameter. It removes data older than the specified number of days. However, deleting rows in SQLite does not shrink the database file. The freed space becomes available for new data within the database, but the file on disk stays the same size.
Repack performs a VACUUM operation that rebuilds the database file from scratch. It compacts all data into a new, smaller file and releases the reclaimed space to the filesystem. This is why repack is the only way to actually see the file size decrease after purging.
How Long Does a Purge Take?
For a moderately sized database (under 2GB), a purge with repack typically completes in a few minutes. For a large database like the 95GB case study, the purge alone took several hours and the repack took even longer. Plan accordingly. Do not interrupt a purge or repack midway through, as this can corrupt the database.
If your database is extremely large and you are running low on disk space, the repack step may fail because it needs temporary space approximately equal to the size of the database. In that case, use the VACUUM INTO method described in the troubleshooting section below.
Auto Purge and Auto Repack
Home Assistant runs an automatic purge every night at a scheduled time based on your purge_keep_days setting. It also performs an automatic repack every second Sunday of the month. These built-in mechanisms help maintain the database, but they are not sufficient if your database is already bloated or if your excludes are not configured. Manual intervention is needed for the initial cleanup.
Step 5: Set purge_keep_days and commit_interval
Once you have purged the database and configured your excludes, you need to set retention parameters to prevent bloat from returning. Two settings control this: purge_keep_days and commit_interval.
purge_keep_days
This setting controls how many days of history the recorder retains. The default is 10 days, which is reasonable for most users. If you need longer history for specific entities, consider using long-term statistics instead of keeping months of recorder data. Long-term statistics are stored separately and are much more space-efficient for trend data.
Recommended values by use case:
7 to 10 days: Good for most users. Keeps enough history for troubleshooting and recent activity review.
14 days: Better if you want two weeks of detailed history for pattern analysis.
30 days: Only if you have excludes configured and adequate storage. Monitor the database size closely.
Avoid 60+ days: Unless you have aggressive excludes and large storage. This is what caused the 95GB case study.
commit_interval
The commit_interval controls how often the recorder flushes pending state changes from memory to the database. The default is 1 second. Increasing it to 30 seconds reduces write frequency, which means fewer disk writes and less SD card wear. This is especially important for users running Home Assistant on a Raspberry Pi with an SD card.
A setting of commit_interval: 30 is a good balance between responsiveness and write reduction. If you set it too high, you risk losing recent state changes if Home Assistant restarts unexpectedly.
Per-Entity Retention With purge_entities
Home Assistant does not natively support per-entity retention in the recorder configuration. However, you can automate different retention periods using the recorder.purge_entities service. This service purges data for specific entities while keeping the rest of your history intact.
Here is an example automation that purges data for high-frequency sensors every 3 days while keeping other history for 10 days:
automation:
  - alias: "Purge high-frequency sensors"
    trigger:
      - platform: time_pattern
        days: 3
    action:
      - service: recorder.purge_entities
        data:
          keep_days: 3
          entity_globs:
            - sensor.*_power
            - sensor.*_temperature
This approach gives you fine-grained control without excluding the entities entirely. You still get recent history for charts and troubleshooting, but old data gets cleaned up on a faster schedule.
Troubleshooting: Why Purge Didn’t Shrink Your Database
This is the single most common frustration in the Home Assistant community. You run a purge, wait for it to complete, check the file size, and nothing changed. The database is exactly the same size. Here is why this happens and how to fix it.
The Root Cause: SQLite and Free Space
When purge deletes rows from the database, SQLite marks that space as free within the database file but does not return it to the filesystem. The file size stays the same. This is by design in SQLite to avoid the overhead of constantly resizing the file. To reclaim the space, you need to repack or VACUUM the database.
If you ran purge but forgot to check the repack box, that is your first issue. Go back and run recorder.purge again with repack set to true.
VACUUM Command
If repack through the Home Assistant UI is not working or you want more control, you can run the VACUUM command directly in the SQLite Web add-on:
VACUUM;
This rebuilds the entire database file and releases all free space. It requires free disk space approximately equal to the current database size because SQLite creates a temporary copy during the process.
VACUUM INTO for Low-Disk-Space Situations
If your disk is nearly full, a regular VACUUM will fail because there is not enough space for the temporary file. This is exactly what happened in the 95GB case study. The solution is VACUUM INTO, which writes the compacted database to a new file:
VACUUM INTO '/config/home-assistant_v2_new.db';
After this completes, stop Home Assistant, replace the old database file with the new one, and restart. This method was the key to reducing that 95GB database to 12GB, an 85 percent reduction, because it only needs space for the new (smaller) file rather than a full copy of the old one.
WAL and SHM File Cleanup
After purging and repacking, you may notice that the home-assistant_v2.db-wal file is still large. The WAL file stores recent transactions before they are committed to the main database. Normally, Home Assistant checkpoints the WAL file automatically, but sometimes it needs manual intervention.
To force a WAL checkpoint, run this command in SQLite Web:
PRAGMA wal_checkpoint(TRUNCATE);
This flushes all WAL data into the main database file and resets the WAL file to zero size. The companion home-assistant_v2.db-shm file is a shared memory index and will be recreated automatically.
If the WAL file refuses to shrink, stopping Home Assistant and restarting it will force a checkpoint. On rare occasions, you may need to delete both the WAL and SHM files while Home Assistant is stopped, but only do this if a checkpoint does not work.
Case Study Recap: 95GB to 12GB
One community member running Home Assistant on an Ubuntu server discovered that home-assistant_v2.db had grown to 95GB despite having purge_keep_days set to 70 days. The problem was that they had no excludes configured, and power meter sensors were updating every few seconds.
The fix involved four steps: adding excludes for power meters and device trackers, running a purge to delete old data, using VACUUM INTO since there was not enough disk space for a regular VACUUM, and then cleaning up the WAL file. The result was a database reduced from 95GB to 12GB, an 85 percent reduction.
Case Study Recap: 4GB to 200MB
Another user had a 4GB database that made their history page unusably slow. After running the top-20 SQL query, they identified media players and device trackers as the primary offenders. They added domain-level excludes for media players and entity_globs for device trackers, then ran a purge with repack. The database dropped to under 200MB, and the history page became instantly responsive again.
Energy Dashboard and Long-Term Statistics
This is the question I see most often in the community forums and on Reddit: will purging the database delete my Energy Dashboard data? The short answer is no, and understanding why requires knowing how Home Assistant stores data.
Home Assistant uses two separate data storage systems for different purposes. The recorder stores raw state changes in the states and events tables. The long-term statistics system stores aggregated data in the statistics and statistics_shortterm tables. The Energy Dashboard reads from the long-term statistics tables, not from the recorder tables.
When you run a purge, it only deletes rows from the recorder tables (states, state_attributes, events, and related tables). It does not touch the statistics or statistics_shortterm tables. Your Energy Dashboard data, hourly and daily consumption charts, and cost calculations all survive the purge intact.
This separation is intentional and important. The recorder is designed for short-term, detailed history (individual state changes). Long-term statistics are designed for trend analysis over weeks, months, and years. Purging the recorder to reclaim space has zero impact on your long-term energy data.
If you want to verify this, check your Energy Dashboard before and after a purge. The charts will look identical because the underlying statistics data is completely separate from what the recorder manages.
One caveat: if you exclude an entity from the recorder entirely using recorder excludes, that entity will also stop contributing to long-term statistics in some cases. The fix is to use the include_entity_globs in the recorder configuration or ensure the entity has state_class set so that statistics collection continues independently. Check the entity’s settings in Developer Tools > States to confirm statistics are being collected.
Frequently Asked Questions
Why does the Home Assistant database get so big?
The Home Assistant database gets big because the recorder integration stores every state change for every entity by default. High-frequency sensors like power meters, device trackers, linkquality sensors, and media players can generate thousands of state changes per hour. Without excludes, this data accumulates continuously, causing the database file to grow by hundreds of megabytes or even gigabytes per week.
How do you shrink the Home Assistant database?
To shrink the Home Assistant database, add recorder excludes in configuration.yaml for noisy entities like power meters and device trackers, then run recorder.purge with repack set to true via Developer Tools u0026gt; Actions. The excludes stop new bloat, and the purge with repack deletes old data and physically reclaims disk space. Most users see a 70 to 90 percent reduction in database size.
Which entities should you exclude from the recorder?
Exclude high-frequency, low-value entities such as linkquality sensors, signal strength sensors, power meter readings, device trackers, media players, uptime sensors, automation states, script states, timers, and counters. Keep temperature, humidity, door and window sensors, motion sensors, light states, and any entity you actively use in history charts or the logbook.
Will purging the database delete my energy dashboard data?
No, purging the database does not delete energy dashboard data. The Energy Dashboard reads from long-term statistics tables (statistics and statistics_shortterm), which are completely separate from the recorder tables that purge targets. Your energy consumption charts, cost data, and historical trends remain intact after any purge operation.
Why did my database not shrink after I purged it?
Your database did not shrink because purge deletes rows but does not release the freed space back to the filesystem. SQLite keeps the space available for future writes within the same file. To actually shrink the file, you must run the purge with repack set to true, or use the VACUUM command. Without repack or VACUUM, the file size stays the same even though old data has been removed.
What does purge_keep_days do in Home Assistant?
purge_keep_days controls how many days of recorder history Home Assistant retains. The default is 10 days. Home Assistant runs an automatic purge every night that deletes recorder data older than this setting. A value of 7 to 10 days works well for most users. Higher values like 30 or 60 days increase database size significantly unless aggressive excludes are configured.
Do I need MariaDB or is SQLite good enough?
SQLite is good enough for the vast majority of Home Assistant users. With proper recorder excludes and a reasonable purge_keep_days setting, the SQLite database stays under 1GB and performs well. MariaDB is only necessary if you have hundreds of entities requiring long retention periods, or if you need advanced database features. Switching databases does not fix bloat caused by missing excludes.
Can I just delete home-assistant_v2.db and start fresh?
Yes, you can delete home-assistant_v2.db while Home Assistant is stopped, and it will recreate an empty database on startup. You will lose all recorder history, but long-term statistics are stored separately and will not be affected. This is a valid last-resort option if your database is corrupted or if you want a completely fresh start without running a purge.
How long does a purge take on a large database?
A purge on a moderately sized database under 2GB typically completes in a few minutes. For a large database like 95GB, the purge can take several hours and the repack even longer. Plan accordingly and never interrupt a purge or repack midway, as this can corrupt the database. For very large databases with limited disk space, use VACUUM INTO instead of repack.
Conclusion
Learning how to shrink a bloated Home Assistant database with recorder excludes and purge comes down to a simple four-step process: check the size, find the worst entities, exclude them in configuration.yaml, and run a purge with repack. Most users see a 70 to 90 percent reduction after their first cleanup. I recommend checking your database size monthly and adjusting your excludes whenever you add new integrations, especially Zigbee devices and power monitoring sensors that tend to be the most prolific data generators. Your history pages will load faster, your backups will be smaller, and your SD card will last longer.