
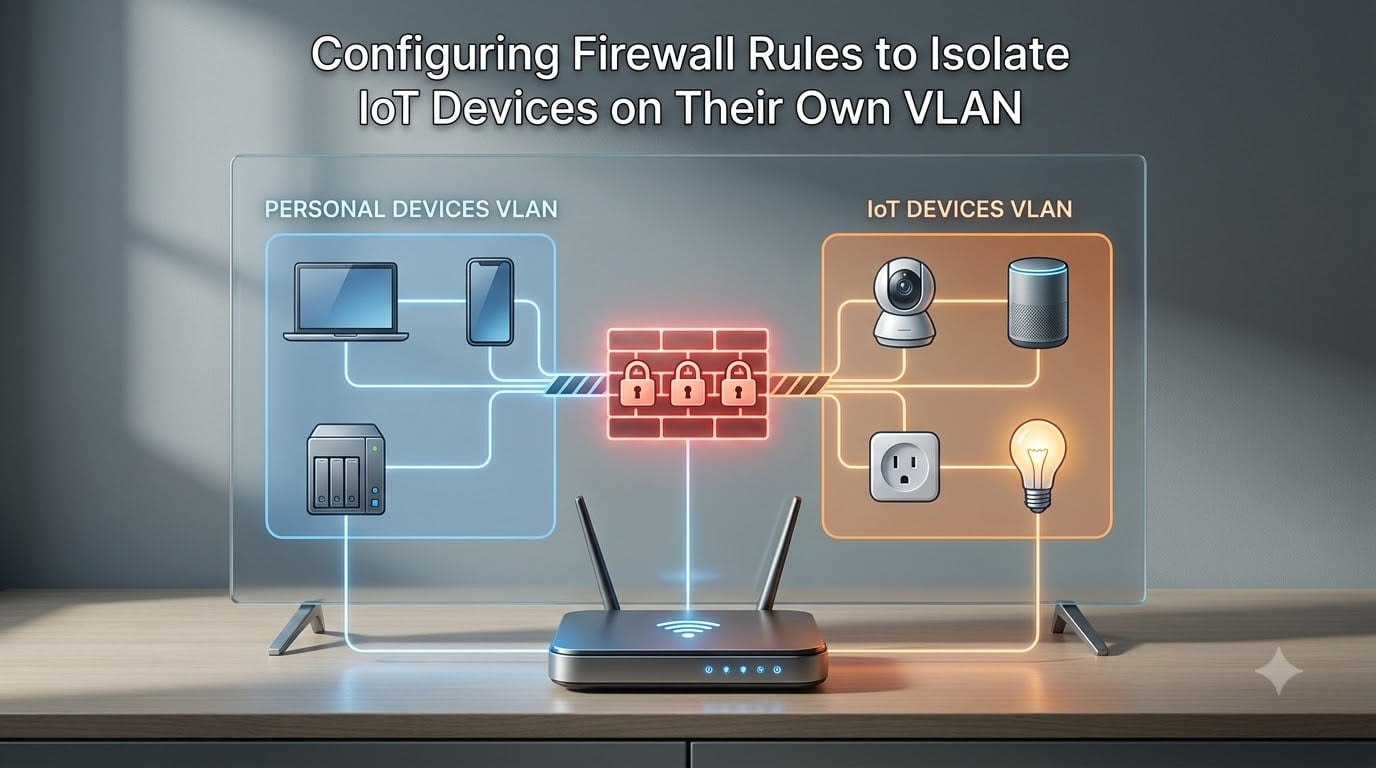
Every smart camera, voice assistant, and connected plug you add to your home network is another potential entry point for attackers. Most IoT devices ship with weak default credentials, rarely receive firmware updates, and phone home to servers you have no control over. Configuring firewall rules to isolate IoT devices on their own VLAN is the single most effective way to protect your personal computers, phones, and data from a compromised smart device.
In this guide, I will walk you through the entire process from start to finish. You will learn what hardware you need, how to plan your network layout, how to configure VLANs and firewall rules step by step, and how to fix the common problems that trip people up — especially mDNS discovery and smart home app connectivity.
I have spent years running segmented home networks on UniFi, pfSense, and OpenWrt, and I have helped hundreds of users on forums troubleshoot their setups. The firewall rule templates and troubleshooting steps below come from real-world configurations, not theoretical documentation.
Table of Contents
Why You Should Isolate IoT Devices on Their Own VLAN?
IoT devices are notoriously insecure. Researchers have found vulnerabilities in everything from smart door locks to baby monitors, and many of these devices never receive a patch after they ship. When all your devices share a single flat network, a compromised smart bulb can scan for weaknesses in your laptop, access shared files on your NAS, or act as a pivot point for further attacks.
VLAN isolation solves this by creating a logical barrier. Your IoT devices get their own network segment with their own IP range. Firewall rules prevent traffic from flowing between the IoT VLAN and your trusted LAN unless you explicitly allow it. Even if an attacker takes over your smart camera, they cannot reach your personal data.
This is not a theoretical risk. Forum users on r/homeassistant and r/Ubiquiti regularly share stories of compromised devices being used to mine cryptocurrency or participate in botnet attacks. One user discovered their smart plug was making hundreds of outbound connections per minute to overseas servers. With proper isolation, that device would have been confined to a network segment with no path to personal devices.
Beyond security, isolation also improves network hygiene. Broadcast traffic from chatty IoT protocols stays on the IoT VLAN instead of flooding your entire network. This can noticeably reduce latency for gaming and streaming on your main devices.
What You Need Before You Start
Before diving into configuration, you need the right hardware. A standard consumer router from your ISP will not work — those devices do not support VLAN tagging or custom firewall rules. You need three components that work together.
VLAN-Capable Router or Firewall
Your router is the brain of the operation. It handles VLAN routing, DHCP assignments, and firewall rule enforcement. The three most popular options for home users are:
Ubiquiti UniFi — The UniFi Dream Machine or UniFi Gateway line is the most beginner-friendly option. The controller interface walks you through VLAN creation visually, and firewall rules use a straightforward allow-or-drop model. This is what I recommend for most people starting out.
pfSense / OPNsense — If you want maximum control and do not mind a steeper learning curve, pfSense or OPNsense running on dedicated hardware or a mini PC gives you enterprise-grade firewall capabilities. You get granular control over every rule, state, and protocol.
OpenWrt — For users who want to flash firmware on existing consumer routers, OpenWrt supports VLANs, firewall zones, and traffic rules. It is a budget-friendly option if you already own compatible hardware.
Managed or Smart-Managed Switch
You need a switch that understands 802.1Q VLAN tagging. A fully managed switch gives you per-port VLAN assignment and trunk port configuration. Smart-managed switches (like the TP-Link TL-SG105E) offer a lighter feature set at a lower price and are sufficient for most home setups.
If your router has built-in switch ports that support VLANs and all your IoT devices connect wirelessly, you may be able to skip a dedicated switch entirely. But once you add wired IoT devices like PoE cameras, a managed switch becomes essential.
VLAN-Aware Wireless Access Point
Your access point must support multiple SSIDs mapped to different VLANs. This is how you create a separate Wi-Fi network for IoT devices. UniFi access points, TP-Link Omada EAP series, and most business-grade APs handle this natively. A standard consumer Wi-Fi router typically cannot assign different SSIDs to different VLANs.
With UniFi, for example, you create a wireless network in the controller, assign it a VLAN ID, and the AP automatically tags traffic from that SSID. Clients connecting to the IoT SSID receive IP addresses from the IoT VLAN’s DHCP pool.
Understanding VLAN Basics: 802.1Q, Tagged Ports, and Subnets
A VLAN (Virtual Local Area Network) works by inserting a small tag into each network packet that identifies which VLAN it belongs to. This tagging follows the IEEE 802.1Q standard. The tag contains a VLAN ID — a number between 1 and 4094 — that the switch and router use to keep traffic separated.
There are two port types you need to understand:
Untagged (access) ports are assigned to a single VLAN. When a device plugs into an untagged port, the switch adds the VLAN tag internally and strips it before sending data to the device. The device itself has no idea a VLAN exists. Most end-device connections use untagged ports.
Tagged (trunk) ports carry traffic for multiple VLANs simultaneously. The VLAN tags remain in the packets so the receiving device knows which VLAN each packet belongs to. The connection between your switch and your router, or between your switch and your access point, uses tagged ports.
Each VLAN also needs its own subnet. A subnet is a range of IP addresses assigned to devices on that VLAN. For a typical home network, you might use a /24 subnet mask (255.255.255.0), which gives you 254 usable addresses. Planning your subnets in advance prevents conflicts and makes firewall rules easier to write.
Planning Your VLAN Layout
Good planning prevents most of the problems people encounter later. Before touching any configuration, decide on your VLAN IDs and subnet ranges.
Here is a layout I have used successfully in dozens of installations:
LAN (Trusted): VLAN 1 — 192.168.1.0/24 — Your personal computers, phones, NAS, and anything you fully trust.
IoT: VLAN 20 — 192.168.20.0/24 — Smart cameras, plugs, bulbs, robot vacuums, and anything with questionable security.
Guest: VLAN 30 — 192.168.30.0/24 — Visitors’ devices, fully isolated from everything else.
Avoid using VLAN 1 for your IoT network. VLAN 1 is the default untagged VLAN on most equipment, and many switches send management traffic on it. Using it for IoT can cause unexpected behavior.
Also decide which devices belong on which VLAN before you start. A good rule of thumb: if the device only needs internet access and does not store your personal data, it goes on the IoT VLAN. Devices like Home Assistant servers that need to control IoT devices are a special case we will cover in the firewall rules section.
Step-by-Step VLAN Configuration for IoT Devices
Now let’s build the actual VLAN. I will use UniFi terminology for the main steps since it is the most common platform, but the same concepts apply to pfSense and OpenWrt.
Step 1: Create the IoT VLAN
In your router interface, navigate to your network or VLAN settings. Create a new VLAN with the ID and subnet you planned. In UniFi, go to Settings, then Networks, then Create New Network. Select VLAN as the type, enter VLAN ID 20, and set the gateway to 192.168.20.1 with subnet 192.168.20.0/24.
Step 2: Configure the DHCP Server
Enable the DHCP server on the new VLAN so IoT devices get IP addresses automatically. Set the DHCP range to a subset of your VLAN subnet — for example, 192.168.20.100 through 192.168.20.250. Leave the lower range reserved for static assignments.
Set the DNS servers carefully. If you plan to use DNS-based blocking (covered later), point this VLAN’s DNS to your Pi-hole or AdGuard Home instance. Otherwise, use a privacy-focused resolver like 1.1.1.1 or 9.9.9.9 instead of your ISP’s DNS servers.
Step 3: Configure Switch Ports
On your managed switch, assign the port connected to your router as a tagged member of VLAN 20 (along with any other VLANs it carries). For any wired IoT devices, assign their ports as untagged members of VLAN 20.
In UniFi, this is handled through switch port profiles. Create a profile for IoT ports with the native network set to your IoT VLAN. For trunk ports (uplink to router or AP), select the “All” profile and ensure VLAN 20 is included.
Step 4: Create the IoT Wi-Fi Network
Create a new SSID specifically for IoT devices. In your access point controller, assign this SSID to VLAN 20. Use a different name than your main network — something like “Home-IoT” — so you can easily identify it.
Set the security to WPA2 or WPA3 with a strong password. Consider hiding the SSID if you want to reduce the chance of neighbors seeing it, though this provides minimal real security benefit. Do not enable client isolation (AP isolation) on this SSID, because many IoT devices need to discover each other locally to function properly.
Step 5: Connect Your IoT Devices
Move your IoT devices to the new network one at a time. Reconnect each device to the IoT SSID, or if it is wired, move its cable to a port assigned to VLAN 20. Wait for each device to pick up an IP address from the IoT DHCP range before moving to the next.
Do this gradually rather than all at once. If something stops working, you will know exactly which device caused the issue.
Configuring Firewall Rules to Isolate IoT Devices on Their Own VLAN
This is the core of the process. Creating the VLAN alone does not provide isolation — it just separates traffic into different segments. The firewall rules are what actually prevent IoT devices from reaching your trusted network.
Firewall rules are evaluated top to bottom. The first rule that matches a packet wins, and all subsequent rules are ignored for that packet. This means rule order is critical. Rules that allow specific traffic go at the top, and rules that block everything else go at the bottom.
Rule 1: Allow Established and Related Sessions
This is the most important rule and the one most guides fail to explain. When your trusted device initiates a connection to the IoT VLAN (for example, Home Assistant connecting to a smart bulb), the firewall creates a state entry. Return traffic from the IoT device matching that state must be allowed back through.
Without this rule, any connection that crosses VLAN boundaries fails immediately because the response packets get dropped.
UniFi: This rule is usually pre-configured. Verify it exists in your LAN IN and IoT IN rule groups with action “Accept” and protocol “All” with state matching established and related.
pfSense: Check the box for “State Type: None” is NOT set, and ensure the default allow rule for established connections is in place. On pfSense, stateful inspection is on by default, so this works automatically as long as you do not disable state tracking.
OpenWrt: In the traffic rules section, ensure that “Allow forwarding from LAN to IoT” exists. Established sessions are handled by the conntrack module automatically.
Rule 2: Allow Specific Cross-VLAN Traffic (Home Assistant)
If you run Home Assistant or any automation server on your trusted LAN, it needs to reach IoT devices. Create a rule that allows traffic from your Home Assistant IP address to the IoT VLAN subnet.
UniFi example: Create a LAN IN rule: Source = 192.168.1.50 (Home Assistant IP), Destination = 192.168.20.0/24, Port = All, Protocol = All, Action = Accept. Place this above your block rules.
pfSense example: On the LAN interface, add a pass rule: Source = 192.168.1.50/32, Destination = 192.168.20.0/24, Port = Any, Protocol = Any. This rule must appear before any block-all rules.
If you have specific IoT devices that need to reach a service on your main LAN (for example, a smart speaker that needs to cast to a media server), create narrow rules for those individual devices and ports rather than opening everything up.
Rule 3: Allow IoT to Internet (WAN)
IoT devices need internet access to function — cloud APIs, firmware updates, and remote control features all require WAN connectivity. Allow traffic from the IoT subnet to the internet.
UniFi example: Create an IoT IN rule: Source = 192.168.20.0/24, Destination = WAN, Port = All, Protocol = All, Action = Accept.
If you want to be more restrictive, consider only allowing specific ports. Most IoT devices need ports 80 (HTTP), 443 (HTTPS), 53 (DNS), 123 (NTP), and 8883 or 8883 (MQTT). Blocking all other outbound ports reduces the attack surface without breaking most devices.
Rule 4: Allow NTP for IoT
Many IoT devices behave erratically without a reliable time source. Some refuse to connect at all. Explicitly allow NTP traffic from the IoT VLAN.
Either allow outbound port 123 to public NTP servers, or better, set up a local NTP server on your router and point IoT devices to it. This prevents them from contacting external servers for time sync.
Rule 5: Block All Remaining IoT to LAN Traffic
This is the catch-all rule that enforces isolation. Place it at the bottom of your rule list. It drops any traffic from the IoT VLAN that was not matched by the rules above.
UniFi example: Create an IoT IN rule: Source = 192.168.20.0/24, Destination = 192.168.0.0/16 (covers all local subnets), Port = All, Protocol = All, Action = Drop.
pfSense example: On the IoT interface, add a block rule: Source = 192.168.20.0/24, Destination = 192.168.0.0/16, Port = Any, Protocol = Any. Since pfSense has an implicit deny at the end of each interface’s rule list, you may not need this explicitly, but adding it makes your intent clear.
OpenWrt example: By default, OpenWrt firewall zones do not forward between each other unless you explicitly create forwarding rules. If you only created a LAN-to-IoT forwarding rule and an IoT-to-WAN forwarding rule, the IoT-to-LAN direction is already blocked by default.
Rule Order Summary
Here is the correct order, from top to bottom:
1. Allow established and related sessions
2. Allow Home Assistant to IoT VLAN
3. Allow specific device exceptions (narrow rules)
4. Allow IoT to WAN
5. Allow IoT to NTP
6. Drop IoT to all local subnets
Getting this order wrong is the number one mistake I see on forums. If the drop rule is above your allow rules, nothing works. Always put specific allow rules first and broad block rules last.
Fixing mDNS and Device Discovery Across VLANs
This is where most people get stuck. mDNS (multicast DNS) is the protocol that lets devices discover each other by name without a central directory. When you say “Alexa, turn on the lights,” the Echo uses mDNS to find smart bulbs on the network. AirPlay, Chromecast, and HomeKit all rely on mDNS.
The problem is that multicast traffic does not cross VLAN boundaries by default. Your Echo on the trusted VLAN cannot discover your smart bulbs on the IoT VLAN. This is actually the correct behavior from a security standpoint, but it breaks smart home functionality.
The solution is an mDNS reflector (sometimes called mDNS repeater or mDNS relay). This service listens for mDNS traffic on one VLAN and re-broadcasts it on another, effectively bridging device discovery across network segments without opening up the full firewall.
UniFi mDNS Configuration
In the UniFi controller, go to Settings, then Network Application (or Controller settings depending on version). Find the mDNS setting and enable mDNS reflector. This automatically relays mDNS traffic between all VLANs.
Forum users consistently report that Echo devices need mDNS reflector enabled to discover Home Assistant’s emulated Hue bridge across VLANs. This is one of the most common troubleshooting topics on r/homeassistant.
pfSense mDNS Configuration
Install the Avahi package under System, then Package Manager. Once installed, go to Services, then Avahi. Enable it and select the interfaces for both your trusted LAN and IoT VLAN. Avahi will relay mDNS between them.
OpenWrt mDNS Configuration
Install the umdns package or use the relayd configuration. Some users prefer running a dedicated mDNS repeater like mdns-repeater, which can be configured via UCI.
Be selective about which VLANs get mDNS relay. If you relay mDNS between your guest network and IoT VLAN, guests could discover and potentially interact with your smart devices.
Home Assistant Integration
If Home Assistant runs on your trusted LAN, it needs network access to the IoT VLAN to poll devices. The firewall rule from Rule 2 above handles this. For devices that use discovery protocols other than mDNS, you may need to allow specific UDP broadcast ports. Home Assistant’s documentation lists the ports each integration requires.
For HomeKit devices specifically, ensure that port 51827 (the HomeKit broadcast port) is relayed or that HomeKit uses the Home Assistant HomeKit bridge integration, which runs on the server and handles pairing from the trusted VLAN.
Blocking IoT Devices from Phoning Home with DNS Filtering
Even with VLAN isolation, your IoT devices still communicate with manufacturer cloud servers. Some of this communication is necessary for functionality, but much of it is telemetry, usage tracking, and data collection that provides no benefit to you.
DNS-based filtering adds another security layer by blocking requests to known tracking and telemetry domains. When an IoT device tries to contact a telemetry server, the DNS query returns no result and the connection fails silently.
Set up Pi-hole or AdGuard Home on your network. Point your IoT VLAN’s DHCP DNS setting to the Pi-hole or AdGuard Home IP address. Import blocklists specifically designed for IoT devices — these exist as community-maintained lists that target manufacturer telemetry endpoints.
Test carefully. Some devices stop functioning if they cannot reach their cloud servers. Start with conservative blocklists and monitor the Pi-hole query log for a few days to see what each device is contacting before adding aggressive blocking.
How to Test If Your VLAN Isolation Is Working
After configuring everything, you need to verify the isolation is actually enforced. Do not skip this step — assumptions about network security are how breaches happen.
Test 1: Ping from IoT to Trusted LAN
Connect a laptop or phone to the IoT SSID. Try to ping a device on your trusted LAN, such as your NAS at 192.168.1.10. The ping should fail with a timeout. If it succeeds, your firewall rules are not blocking cross-VLAN traffic and you need to revisit your rule configuration.
Test 2: Ping from Trusted LAN to IoT
From a device on your trusted network, try to ping a device on the IoT VLAN. This should also fail unless you have a specific allow rule for the source device. Home Assistant should be able to reach IoT devices if Rule 2 is configured correctly.
Test 3: Internet Access from IoT
Confirm that IoT devices can still reach the internet. From a device on the IoT SSID, try loading a website or running a speed test. If internet does not work, check your WAN allow rule and DNS settings.
Test 4: mDNS Discovery
Open the smart home app you use to control devices. If devices on the IoT VLAN appear and respond to commands, your mDNS reflector is working. If the app cannot find devices, verify mDNS relay settings on both VLAN interfaces.
Run all four tests after every configuration change. I have seen cases where a firmware update reset firewall rules to defaults, silently breaking isolation weeks after the initial setup.
Troubleshooting Common IoT VLAN Issues
IoT Devices Cannot Connect to Wi-Fi
Double-check that the IoT SSID is mapped to the correct VLAN ID. A common mistake is creating the wireless network without assigning the VLAN tag, which causes devices to land on the default untagged VLAN instead. Verify the DHCP server is enabled on the IoT VLAN and has available addresses in its pool.
Smart Home App Cannot Find Devices
This is almost always an mDNS issue. Ensure your mDNS reflector is enabled and running on both the trusted and IoT VLAN interfaces. Some platforms require a restart of the mDNS service after VLAN changes. Also check that your phone is on the trusted VLAN — apps running on the IoT VLAN may not be able to reach cloud APIs to initiate the discovery process.
Devices Have No Internet Access
Check that the IoT-to-WAN allow rule exists and is positioned above the drop rule. Verify DNS is working — try setting a device to use 8.8.8.8 manually to rule out DNS issues. If you are using Pi-hole, ensure it is actually resolving queries for the IoT VLAN and not blocking essential domains.
Firewall Rules Seem to Not Work
Rule order is the most common culprit. In UniFi, rules are evaluated in the order they appear within each rule group. If your drop rule is above your allow rules, the allows never get evaluated. In pfSense, check that you have not accidentally created a floating rule that overrides your interface rules.
IGMP Snooping Breaking Multicast
IGMP snooping optimizes multicast traffic by only forwarding it to ports that have joined the multicast group. While this reduces network overhead, it can block legitimate multicast traffic if misconfigured. If mDNS relay is configured but devices still cannot discover each other, try temporarily disabling IGMP snooping to see if it resolves the issue.
VLAN vs Guest Network: Which Is Better for IoT?
Many routers offer a built-in guest network feature, and people often ask whether that is sufficient instead of a full VLAN setup. The short answer: a guest network provides partial isolation but lacks the control of a proper VLAN.
Guest networks typically isolate connected devices from each other and from your main network using AP-level client isolation. However, they do not give you firewall rule control, custom DNS settings, or the ability to selectively allow specific devices to cross the boundary. You get an all-or-nothing wall.
With a VLAN, you control every aspect. You can allow Home Assistant to reach IoT devices while blocking everything else. You can apply DNS filtering only to IoT devices. You can create granular rules for specific devices and ports. Guest networks are fine for visitors, but VLANs are the right tool for long-term IoT security.
That said, if your router does not support VLANs and you are not ready to upgrade, a guest network is better than no isolation at all. It at least prevents IoT devices from scanning your main network.
Frequently Asked Questions
Should IoT VLAN be isolated?
Yes, your IoT VLAN should be isolated from your trusted network using firewall rules. Isolation ensures that if a smart device is compromised, the attacker cannot reach your personal computers, NAS, or other sensitive devices. You still allow IoT devices to access the internet, but you block all traffic between the IoT VLAN and your LAN unless explicitly permitted.
How to use VLAN for IoT devices?
Create a VLAN with a unique ID and subnet on your router, enable a DHCP server for it, configure switch ports as tagged or untagged members, create a dedicated Wi-Fi SSID mapped to the VLAN, then add firewall rules that block IoT-to-LAN traffic while allowing internet access. Move devices to the new network gradually and test isolation afterward.
How to isolate IoT devices on network?
Isolate IoT devices by placing them on a separate VLAN and configuring firewall rules that block cross-VLAN traffic. The key rules are: allow established sessions, allow specific exceptions like Home Assistant, allow IoT to WAN, and drop all remaining IoT-to-LAN traffic. Test by pinging across VLANs to confirm isolation.
Should I put IoT devices on their own network?
Yes. IoT devices are often insecure, rarely updated, and can be compromised by attackers. Putting them on their own network segment prevents a hacked smart device from accessing your personal data, files, and trusted computers. VLAN isolation is the most effective home-level security measure for smart device management.
How to setup UniFi firewall rules?
In the UniFi controller, go to Settings, then Security and Firewall, then create rules in the LAN IN group. Add an allow rule for established sessions, an allow rule for Home Assistant to the IoT subnet, an allow rule for IoT to WAN, and a drop rule for IoT to all local subnets. Ensure allow rules are above the drop rule in the list, as UniFi evaluates rules top to bottom.
Wrapping Up
Configuring firewall rules to isolate IoT devices on their own VLAN is the most impactful security change you can make to your home network. The process comes down to five steps: plan your VLANs, create the network segments, configure firewall rules in the correct order, enable mDNS relay for device discovery, and test everything.
Start with the firewall rule templates in this guide and adjust them for your specific devices and platform. Take your time with testing — verifying that isolation actually works is just as important as setting it up. Once everything is running, you will have peace of mind knowing that even if a smart device is compromised, your personal network stays safe.