
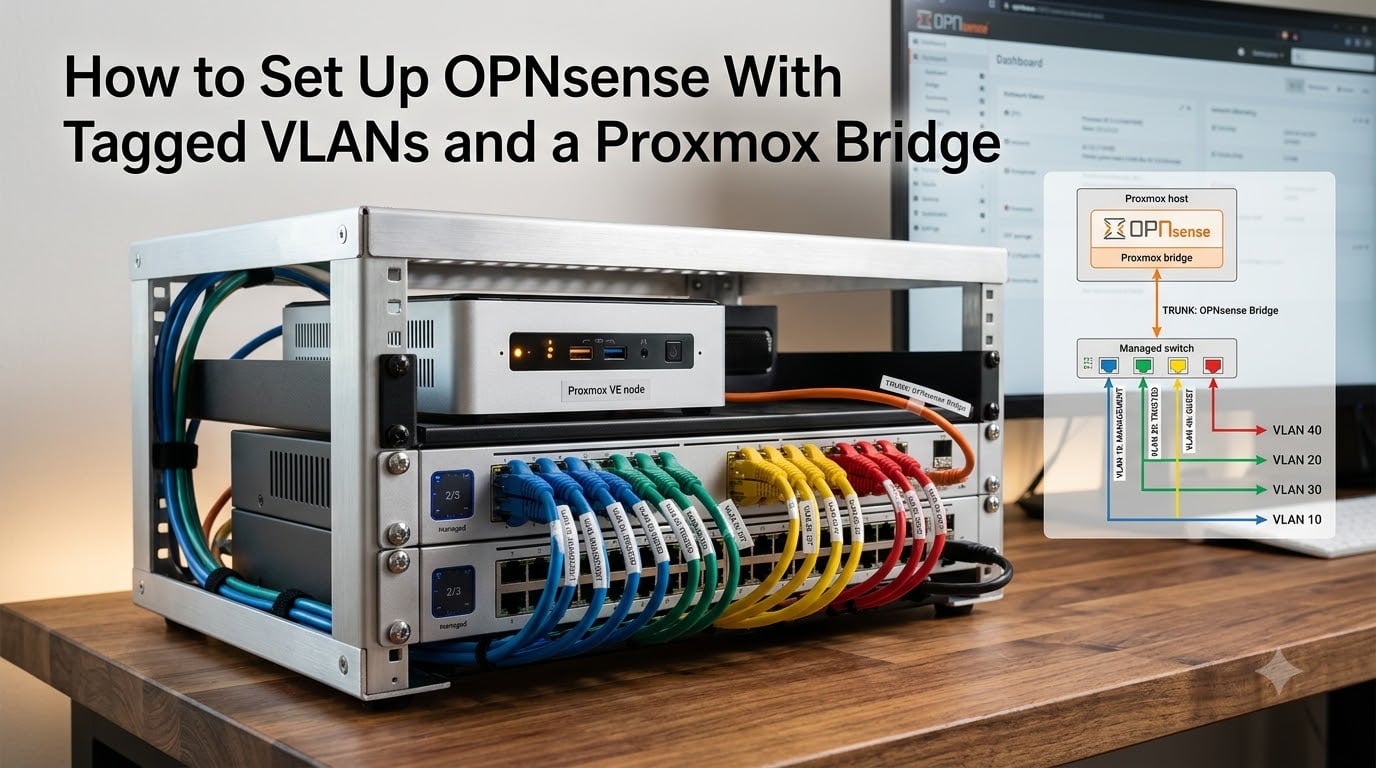
Setting up OPNsense with tagged VLANs and a Proxmox bridge is one of the cleanest ways to run a virtualized firewall in a homelab. It gives you a single physical network cable that carries multiple isolated segments for guests, IoT, lab workloads, and management traffic. In this guide I walk through the full configuration: hardware sizing, the network topology, OPNsense VLAN creation, Proxmox’s VLAN-aware bridge, switch trunk setup, DHCP and firewall rules, and the troubleshooting tips I wish I had on my first build.
I tested this configuration on a Proxmox 8.x host with an Intel N100 CPU, 16 GB of RAM, and a managed TP-Link switch. The whole process took about 45 minutes once I had the topology drawn out. If you have a modern managed switch, a Proxmox node with at least two NICs, and a copy of the OPNsense ISO, you can follow along.
Table of Contents
Prerequisites and Hardware Requirements for OPNsense on Proxmox
Before you start configuring VLANs, make sure your hardware and software can handle the workload. Under-spec the host and OPNsense will drop packets during heavy traffic.
CPU and RAM Sizing
OPNsense is light on resources. In my testing on a gigabit link, a single vCPU and 2 GB of RAM handled 940 Mbps of iPerf3 traffic without breaking a sweat. For most home labs I recommend 2 vCPUs and 4 GB of RAM. That gives the OS room for Suricata, Zenarmor, or VPN packages if you decide to add them later.
If you run ZFS on the Proxmox node, leave 1 GB of RAM for the ARC cache. The forum threads at forum.opnsense.org routinely point out that OPNsense sees RAM through the balloon driver, so disable ballooning on the VM to keep memory stable. Proxmox’s web UI exposes this under Hardware > Memory.
Network Hardware (NICs and Switch)
You need a managed switch that supports 802.1Q VLAN tagging and a Proxmox host with at least two network interfaces. One NIC becomes the WAN, the other becomes the LAN trunk. Modern Intel i226-V or i225-V NICs work well; many homelab builders report smooth performance with the onboard 2.5 GbE ports on N100 boards.
If your switch supports LACP, a Linux bond between the two Proxmox NICs and the switch gives you redundancy and 2x the bandwidth. If not, a single trunk port is fine for most setups under one gigabit.
Proxmox Version and OPNsense ISO
Use Proxmox VE 8.x or later. The VLAN-aware bridge feature has been stable for years, but recent kernels handle bridge offloading better. Download the latest OPNsense dvd ISO from opnsense.org and upload it to your Proxmox storage before creating the VM.
Network Topology: Understanding VLAN Tagging on Proxmox and OPNsense
The biggest confusion I see on the Proxmox and OPNsense forums is who should tag the VLANs. Let me clear that up with a quick topology and a definition.
What Is a VLAN-Aware Bridge?
A VLAN-aware bridge in Proxmox is a Linux bridge that understands 802.1Q tags. Instead of creating one Linux bridge per VLAN, you create a single vmbr with bridge-vlan-aware yes set, and Proxmox handles the tagging for any VM or container attached to it. This is the modern, recommended approach. The older method of creating one bridge per VLAN works too, but it scales poorly.
Who Tags the VLANs: OPNsense or Proxmox?
You can have either side tag the VLANs, but the simplest design is to let OPNsense do all the tagging. The Proxmox bridge stays as a plain trunk that carries tagged traffic, and OPNsense creates a parent interface plus child VLAN interfaces. This matches the advice on the OPNsense forum thread “OPNsense on Proxmox”, where long-time users say it’s easier to let one side own the tagging.
Sample VLAN Plan for Your Homelab
A typical plan for 2026 looks like this:
- VLAN 10 – Management (Proxmox web UI, iDRAC)
- VLAN 20 – Trusted (workstations, laptops)
- VLAN 30 – Homelab (VMs, LXC containers)
- VLAN 40 – IoT (smart bulbs, TVs, assistants)
- VLAN 50 – Guest WiFi
Keep the management VLAN small and tightly firewalled. If you lose connectivity to OPNsense, the management VLAN gives you a way back in.
Install OPNsense on Proxmox and Configure Initial Network Interfaces
Now that the plan is clear, let’s install OPNsense and wire up the NICs.
Creating the OPNsense VM
Click Create VM in Proxmox. Use these settings:
- System: BIOS = SeaBIOS (OVMF works too but SeaBIOS is simpler for FreeBSD-based OPNsense).
- Disks: VirtIO Block, 16 GB is plenty for the OS; add a second disk if you want logs or proxy cache.
- CPU: 2 cores, type = host. Avoid the default kvm64 if your CPU supports AES-NI.
- Memory: 4096 MB. Disable ballooning.
Assigning NICs to the VM
Add two network devices. The first uses your WAN-facing NIC bridged to a non-VLAN-aware bridge, or simply passes through the physical interface. The second uses the trunk bridge we will configure later, with VLAN tag left empty so it acts as a tagged trunk.
If you have a separate management interface, you can use PCI passthrough for the WAN NIC. That gives you maximum isolation and lets OPNsense see real hardware. Many users in the Proxmox forums prefer this approach for production routers.
Booting the OPNsense Installer
Start the VM and open the console. The OPNsense installer is text-based. Accept the defaults, pick Install (ZFS) or UFS, and reboot when prompted. After the reboot you will land on the console menu where you assign interfaces. Assign vtnet0 as WAN and vtnet1 as LAN. We will create the VLANs next.
Create VLANs in OPNsense: Step-by-Step Configuration
OPNsense is fully VLAN-aware, which is why it is so popular for this kind of setup. From the web UI:
Parent Interface Assignment
Log in to OPNsense at https://192.168.1.1 (the default). Go to Interfaces > Assignments. The LAN interface is already there. Make sure the trunk interface (vtnet1 in my lab) is assigned as a separate interface, often called LAN2 or OPT1.
Adding VLAN Interfaces
Go to Interfaces > Other Types > VLAN. Click + to add a new VLAN. Repeat this for every VLAN ID you want. Each row asks for:
- Parent: the trunk interface (LAN2 / vtnet1)
- VLAN tag: 10, 20, 30, etc.
- Description: human-friendly name like “MGMT” or “IoT”
Click Apply. Now go back to Interfaces > Assignments and assign each new VLAN to an OPT interface so you can configure it.
Assigning IP Addresses to VLAN Interfaces
Click each new OPT interface, enable it, and set a static IPv4 address:
- VLAN 10: 10.10.10.1/24
- VLAN 20: 10.20.20.1/24
- VLAN 30: 10.30.30.1/24
- VLAN 40: 10.40.40.1/24
- VLAN 50: 10.50.50.1/24
Save and apply. OPNsense now has a routable interface on every VLAN.
Configure a VLAN-Aware Bridge in Proxmox
With OPNsense ready to receive tagged traffic, the next step is the Proxmox side of the trunk.
Creating the Linux Bridge (vmbr)
Go to Datacenter > Node > System > Network. Click Create > Linux Bridge. Name it vmbr1. Set the bridge port to your trunk NIC (for example eno2 or enp3s0). Enable VLAN aware and set VLAN IDs to the range you need, usually 2-4094.
The resulting entry looks like this in /etc/network/interfaces:
auto vmbr1
iface vmbr1 inet manual
        bridge-ports eno2
        bridge-stp off
        bridge-fd 0
        bridge-vlan-aware yes
        bridge-vids 10 20 30 40 50
Apply the change with ifreload -a from the Proxmox shell. If you lose connectivity, connect via IPMI or a serial console and roll back.
Optional Linux Bond for LACP
If your switch supports 802.3ad, you can bond two NICs together. Create a Linux Bond first with mode 802.3ad (LACP), then attach it as the bridge port of vmbr1. The bond shows up in Proxmox as bond0, and the bridge entry uses bond0 instead of the single NIC.
This is the same approach documented on homenetworkguy.com in their LAG-with-VLANs guide. It works reliably with TP-Link Omada and MikroTik switches.
Configure the Switch Trunk Port Connected to Proxmox
The trunk port on your managed switch tells the switch which VLANs are allowed on that cable. If you skip this, you will see traffic but no DHCP and no connectivity.
Setting the Trunk Mode
On the switch port connected to Proxmox, set the mode to Trunk (Cisco/Aruba terminology) or Tagged (TP-Link terminology). Do not leave it on Access or Untagged, or Proxmox will only see one VLAN.
Tagging Allowed VLAN IDs
Add 10, 20, 30, 40, and 50 (whatever you picked) to the allowed VLAN list on that trunk port. Most switches let you specify a range or a comma-separated list. Make sure the trunk port and the OPNsense VLAN list match exactly.
Native/UNTAG VLAN for Management
If you want Proxmox’s management IP to live on VLAN 10 untagged, set the PVID / Native VLAN of that port to 10. Then in Proxmox’s network config, give vmbr1 a management IP like 10.10.10.50/24. If you prefer to keep Proxmox on a separate management interface, leave the PVID as 1 and route a dedicated management VLAN through OPNsense.
Assign VMs and LXC Containers to Specific VLANs
With the trunk in place, every VM and container can join a VLAN with one click.
VM Network Configuration
Edit a VM’s hardware, find its NIC, and change the VLAN tag field to the desired VLAN ID. Proxmox stamps each frame leaving that NIC with the correct 802.1Q tag. Save and start the VM. From the inside, you should get a DHCP lease from the right scope.
LXC Container VLAN Tag
LXCs work the same way. Open the container’s Network tab and enter the VLAN tag. There is no need to create a separate Linux bridge per VLAN; the VLAN-aware vmbr1 handles all of them.
DHCP Server and Firewall Rules per VLAN
A VLAN without DHCP and firewall rules is just an isolated Layer 2 segment. Let’s make those VLANs usable.
DHCP Server Setup for Each VLAN
In OPNsense go to Services > ISC DHCPv4 > [VLAN interface]. Enable the service, set a range such as 10.30.30.100 - 10.30.30.200, and add the DNS servers and gateway. Repeat for every VLAN. If you only want to relay, point the VLAN at an existing DHCP server using Services > DHCPv4 Relay.
To make sure VLANs actually receive DHCP, the firewall must allow DHCP on each interface. By default the LAN rules allow it; for OPT interfaces you need a rule that permits UDP 67/68 from the VLAN subnet to the OPNsense address.
Basic Firewall Rules and Inter-VLAN Routing
Go to Firewall > Rules and click each VLAN. A safe starter policy is:
- Allow established and related traffic
- Block traffic from VLAN 40 (IoT) and VLAN 50 (Guest) to your trusted VLANs
- Allow DNS to OPNsense or upstream resolvers
- Allow DHCP on each interface
Inter-VLAN routing happens automatically because OPNsense has an IP on every VLAN, but the rules decide what is actually permitted. The default “allow all on LAN” rule does not apply to OPT interfaces, so you must add explicit rules.
Troubleshooting Common OPNsense and Proxmox VLAN Issues
Even with a clean config, VLANs can silently fail. Here are the three problems I see most often in the forums.
No DHCP on VLAN
If a VLAN interface is up but devices get no lease, check three things: the switch trunk port has the VLAN in its allowed list, the OPNsense firewall rule on that interface allows UDP 67/68, and the DHCP service is actually enabled on that VLAN’s interface tab.
Losing Proxmox Management Access
The classic mistake: you change vmbr0 to a VLAN tag and lose the web UI. Always keep Proxmox management on a separate bridge or on the native/untagged VLAN. If you do get locked out, use IPMI, a serial console, or a keyboard and monitor on the host to fix /etc/network/interfaces.
Performance and MTU Issues
If you enable jumbo frames (MTU 9000) end to end but forget one link, throughput tanks. For most homelabs, stick with the default MTU 1500 across the bridge and trunks. If you set MTU 9000 on vmbr1, set it on the OPNsense VLAN interface, the switch port, and every VM that uses jumbo frames. Otherwise, drop them all to 1500 and move on.
Frequently Asked Questions
How much RAM for OPNsense on Proxmox?
2 GB is the practical minimum, 4 GB is the comfortable default, and 8 GB covers plugins like Suricata and Zenarmor. Disable ballooning on the VM so memory does not get reclaimed under load.
Is OPNsense VLAN aware?
Yes. OPNsense supports 802.1Q VLAN tagging on every parent interface. You create the VLANs under Interfaces u0026gt; Other Types u0026gt; VLAN and assign each one to an OPT interface.
Can I use OPNsense on Proxmox?
Yes. Proxmox fully supports OPNsense as a KVM guest. Use VirtIO NICs for best throughput, set CPU type to host, and avoid ZFS-on-ZFS for the VM disk.
Can OPNsense act as a router?
OPNsense is a full-featured router. It handles static routes, dynamic routing, NAT, policy-based routing, BGP and OSPF via plugins, and inter-VLAN routing out of the box.
Is it better to run OPNsense on Proxmox or bare metal?
Bare metal gives you maximum throughput and the smallest attack surface, but you lose the ability to snapshot, migrate, and reuse the host for other services. Proxmox is more flexible and is what most homelab users pick in 2026.
Why is my OPNsense VLAN not working?
Nine times out of ten it is one of three things: the switch trunk port is not tagging the VLAN, the Proxmox bridge is not VLAN-aware, or the firewall rule on the OPT interface is blocking DHCP and DNS.
Final Thoughts on Running OPNsense With Tagged VLANs in Proxmox
A Proxmox VLAN-aware bridge plus OPNsense as the tagging router is one of the most flexible homelab designs you can build in 2026. You get network segmentation, snapshot rollbacks, and a single pane of glass for firewall rules. Start with three VLANs, get DHCP and firewall rules right, then expand to IoT and guest networks as you grow comfortable.
If you found this useful, save the page and share it with anyone setting up their first OPNsense + Proxmox VLAN lab.