
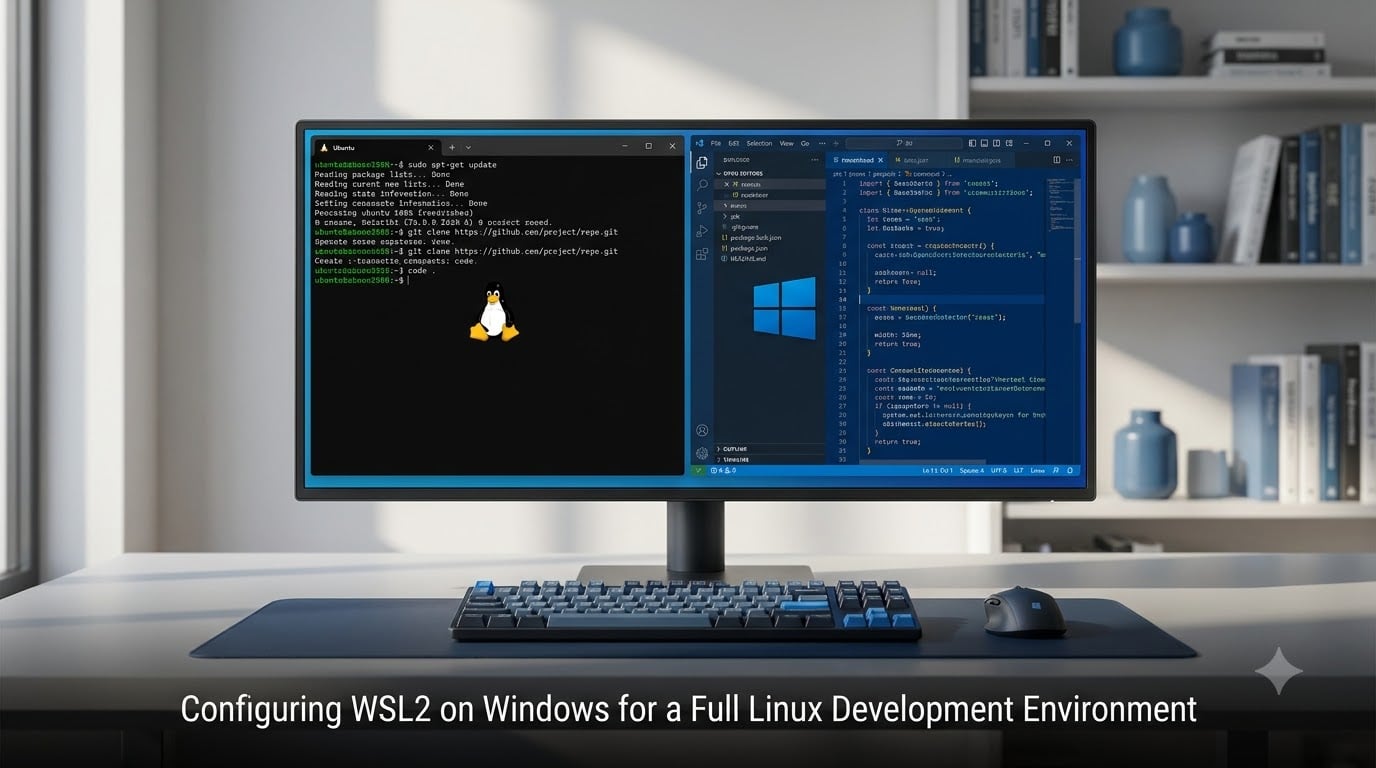
If you’ve ever felt torn between the polished Windows desktop experience and the powerful Linux command-line tools, you’re not alone. Configuring WSL2 on Windows for a full Linux development environment bridges this gap perfectly, giving you native Linux performance without leaving your familiar Windows setup. In this guide, I’ll walk you through every step of setting up WSL2, from installation to advanced configuration, so you can build a production-ready development environment in 2026.
WSL2 has transformed how developers work on Windows. Gone are the days of sluggish virtual machines or complicated dual-boot setups that leave you constantly restarting. You get the full power of a Linux kernel running directly on Windows, with seamless integration between the two operating systems.
Table of Contents
- What is WSL2 and Why Use It for Development?
- Prerequisites and System Requirements
- Step-by-Step WSL2 Installation
- Configuring Your Linux Environment
- Essential Development Tools Setup
- Advanced Configuration Tips
- Best Practices for WSL2 Development
- Troubleshooting Common Issues
- Frequently Asked Questions
- Conclusion
What is WSL2 and Why Use It for Development?
WSL2 (Windows Subsystem for Linux version 2) is a feature in Windows 10 and Windows 11 that runs a full Linux kernel directly on Windows. Unlike its predecessor WSL1, which translated Linux system calls to Windows equivalents, WSL2 uses a lightweight virtual machine with a real Linux kernel. This means near-native performance for Linux applications.
The performance difference is substantial. Developers on Reddit and forums report build times that are 40-60% faster compared to running equivalent tools natively on Windows. For example, a Node.js project that took 45 seconds to build on Windows might complete in under 20 seconds when running in WSL2 with project files stored in the Linux filesystem.
WSL2 vs Virtual Machines
Traditional virtual machines like VMware or VirtualBox allocate fixed resources and require full OS installations. WSL2, by contrast, shares resources dynamically with Windows. It boots in seconds rather than minutes, integrates directly with Windows file system, and uses significantly less memory when idle.
Docker developers particularly benefit from WSL2. The Docker Desktop WSL2 backend runs containers significantly faster than the old Hyper-V approach, with developers reporting container start times dropping from 30+ seconds to under 5 seconds. File system performance for bind mounts improved dramatically as well.
Key Benefits for Developers
WSL2 gives you access to the entire Linux toolchain. Package managers like apt, yum, and pacman work exactly as they do on native Linux. You can run Node.js, Python, Ruby, Go, Rust, and virtually any Linux-native development tool without modification. The Windows integration means you can edit code in VS Code on Windows while running build tools in Linux.
Another major advantage is consistency with production environments. If your applications deploy to Linux servers, developing in WSL2 means you’re working in an environment that closely mirrors production. This eliminates many “works on my machine” issues that plague cross-platform development teams.
Prerequisites and System Requirements
Before configuring WSL2 on Windows for a full Linux development environment, verify your system meets the requirements. You need Windows 10 version 2004 or later (build 19041 and above) or any version of Windows 11. Check your Windows version by pressing Win+R, typing winver, and pressing Enter.
Hardware virtualization must be enabled in your BIOS or UEFI settings. This typically appears as Intel VT-x, AMD-V, or SVM Mode in your motherboard’s firmware settings. Most modern systems have this enabled by default, but some manufacturers disable it to save power. Without hardware virtualization, WSL2 cannot function.
Check Virtualization Status
You can verify virtualization is active in Windows by opening Task Manager (Ctrl+Shift+Esc), clicking the Performance tab, and selecting CPU. Look for “Virtualization: Enabled” in the bottom-right corner. If it shows as disabled, restart your computer and enter BIOS/UEFI setup (usually F2, F12, or Delete during boot) to enable it.
Virtual Machine Platform must also be enabled as a Windows feature. This Windows component provides the virtualization infrastructure that WSL2 uses. I’ll cover enabling this in the installation steps below, but you can verify it’s already active by opening PowerShell as Administrator and running:
Get-WindowsOptionalFeature -Online -FeatureName VirtualMachinePlatform
If the State shows “Enabled,” you’re ready to proceed. If not, the installation process will enable it automatically.
Step-by-Step WSL2 Installation
Installing WSL2 is straightforward, but each step matters. Follow these instructions exactly to ensure your Linux development environment is properly configured from the start.
Step 1: Enable Required Windows Features
Open PowerShell as Administrator. Right-click the Start button and select “Windows PowerShell (Admin)” or “Terminal (Admin)” if you’re using Windows 11. Run the following command to enable both WSL and Virtual Machine Platform in one step:
dism.exe /online /enable-feature /featurename:Microsoft-Windows-Subsystem-Linux /all /norestart
Next, enable the Virtual Machine Platform:
dism.exe /online /enable-feature /featurename:VirtualMachinePlatform /all /norestart
Restart your computer after running both commands. The features won’t activate until you reboot.
Step 2: Set WSL2 as Default
After restarting, open PowerShell as Administrator again. Set WSL2 as the default version so all future Linux installations use the faster architecture:
wsl --set-default-version 2
This ensures any Linux distribution you install later automatically uses WSL2 rather than falling back to WSL1.
Step 3: Install Your Linux Distribution
Microsoft simplified WSL2 installation significantly in recent Windows versions. The single command approach handles everything:
wsl --install
This command downloads and installs Ubuntu as the default Linux distribution, enables WSL2, and sets up everything automatically. The download is approximately 500MB and may take several minutes depending on your internet connection.
If you prefer a different distribution, you can specify it:
wsl --install -d Debian
Available distributions include Ubuntu, Debian, Kali Linux, openSUSE, and others. Ubuntu remains the most popular choice with excellent community support and extensive package availability.
Step 4: Complete Initial Linux Setup
After installation completes, a terminal window opens automatically. You’ll be prompted to create a UNIX username and password. This is separate from your Windows credentials. Choose a username (lowercase, no spaces) and a strong password. You’ll need this password for administrative commands using sudo.
Once setup completes, update your Linux packages to ensure you have the latest security patches and software versions:
sudo apt update && sudo apt upgrade -y
This command refreshes the package list and upgrades all installed packages. The -y flag automatically confirms prompts. Depending on how recently the distribution image was published, this could download hundreds of megabytes of updates.
Step 5: Verify WSL2 is Active
Confirm your installation is actually using WSL2 and not falling back to WSL1. In PowerShell, run:
wsl --list --verbose
You should see your distribution listed with VERSION showing “2”. If it shows “1,” convert it to WSL2:
wsl --set-version Ubuntu 2
The conversion process takes a few minutes. Once complete, you’re running a full Linux kernel inside Windows.
Configuring Your Linux Environment
With WSL2 installed, configuring the environment for productive development work requires several additional steps. These setup decisions significantly impact your daily workflow and system performance.
Choosing Your Linux Distribution
Ubuntu works well for most developers. It has extensive package repositories, strong community support, and excellent compatibility with cloud platforms. However, different distributions suit different needs. Debian offers rock-solid stability for server-focused development. Fedora provides cutting-edge packages for developers who want the latest tools. Kali Linux specializes in security testing and penetration testing workflows.
You can install multiple distributions simultaneously and run them concurrently. List available distributions with:
wsl --list --online
Install additional distributions with the -d flag as shown earlier. Each distribution maintains its own filesystem and packages, so you can experiment without affecting your primary development environment.
Windows Terminal Configuration
The new Windows Terminal provides a vastly improved experience over the legacy console. It supports tabs, customizable profiles, GPU-accelerated text rendering, and proper Unicode support. If you’re on Windows 11, it’s installed by default. On Windows 10, install it from the Microsoft Store.
Configure Windows Terminal to start in your Linux environment by default. Open Terminal, click the down arrow in the title bar, and select Settings. Under “Default profile,” choose your Linux distribution. Now every new terminal tab opens directly to your WSL2 command line.
Customize the appearance to suit your preferences. The settings JSON file lets you change color schemes, fonts, and backgrounds. Many developers prefer dark themes with high-contrast colors for long coding sessions. Solarized, One Dark, and Dracula themes are popular choices available as built-in options.
File System Best Practices
File storage location dramatically affects WSL2 performance. This is one of the most critical decisions when configuring WSL2 on Windows for a full Linux development environment. The Linux filesystem (accessed via /home/username/ or ~/) runs on an ext4 virtual disk and delivers significantly faster performance than accessing Windows files through /mnt/c/.
Benchmarks from developer forums show consistent results: file operations on the Linux filesystem run 2-5 times faster than operations on Windows drives. For a Node.js project with 10,000+ files, npm install might take 30 seconds on the Linux filesystem versus 2-3 minutes when the project resides on the Windows C: drive.
Store your projects in your Linux home directory whenever possible. Use the path format ~/projects/ for maximum performance. If you need to access these files from Windows applications, navigate to \wsl$Ubuntuhomeusernameprojects in File Explorer or use the Windows path directly.
When you must work with files on Windows drives, minimize file system watchers. Tools like npm, yarn, and webpack use inotify to watch for file changes, which has performance overhead when crossing the Windows-Linux boundary. Configure these tools to use polling instead when working with Windows-hosted files.
Essential Development Tools Setup
With the base environment configured, installing development tools transforms WSL2 into a production-ready workspace. These tools form the foundation of most modern development workflows.
Visual Studio Code with WSL Extension
VS Code offers the tightest integration with WSL2 of any editor. Install Visual Studio Code on Windows (not inside Linux). Then install the “WSL” extension from Microsoft. This extension enables remote development where the editor runs on Windows but the language server, terminal, and debugger run inside WSL2.
Open a project stored in WSL2 by launching VS Code from inside Linux. Navigate to your project directory in WSL2, then run:
code .
This command opens VS Code on Windows with a connection to your WSL2 environment. You’ll see “WSL: Ubuntu” in the bottom-left corner of the VS Code window, confirming the remote connection. All terminal windows inside VS Code now open directly to your Linux environment.
Extensions install separately for remote WSL connections. When connected to WSL, the Extensions panel shows “Local – Installed” for Windows-side extensions and “WSL: Ubuntu – Installed” for Linux-side extensions. Install language-specific extensions like Python, Go, or Rust in the WSL environment so they have access to Linux-based language servers and tools.
Git Configuration
Git works identically in WSL2 to native Linux. Install it if your distribution doesn’t include it:
sudo apt install git
Configure your identity:
git config --global user.name "Your Name"git config --global user.email "[email protected]"
Credential handling requires special attention in WSL2. The Git Credential Manager for Windows integrates with WSL2, allowing you to authenticate once for both Windows and Linux Git operations. Enable it with:
git config --global credential.helper "/mnt/c/Program\ Files/Git/mingw64/libexec/git-core/git-credential-manager.exe"
Line ending configuration matters for cross-platform projects. Set core.autocrlf to input on Linux to convert CRLF to LF on commit but not on checkout:
git config --global core.autocrlf input
Version Managers for Multiple Runtime Versions
Node.js developers benefit from NVM (Node Version Manager), which allows installing and switching between multiple Node.js versions. Install NVM:
curl -o- https://raw.githubusercontent.com/nvm-sh/nvm/v0.39.0/install.sh | bash
Source your shell configuration or restart the terminal, then install Node.js:
nvm install --lts
This command installs the latest long-term support version of Node.js. Switch between versions with nvm use followed by a version number. Different projects can specify different Node.js requirements, and NVM handles switching automatically when combined with .nvmrc files.
Java developers should consider SDKMAN for similar version management. Install it:
curl -s "https://get.sdkman.io" | bash
SDKMAN manages Java, Gradle, Maven, and other JVM-related tools. Install multiple JDK versions and switch between them instantly. This is particularly valuable when working on projects targeting different Java versions.
Docker Desktop Integration
Docker Desktop for Windows now uses WSL2 as its default backend. This integration provides dramatic performance improvements over the older Hyper-V approach. Install Docker Desktop from the official website and ensure WSL2 integration is enabled in Settings > Resources > WSL Integration.
Enable integration for your specific Linux distribution. This creates docker and docker-compose commands inside WSL2 that control the Docker daemon. You can run containers from either Windows PowerShell or the Linux command line, with both environments seeing the same containers and images.
For maximum performance with Docker in WSL2, store Docker volumes and bind mounts on the Linux filesystem. A docker-compose project with volumes on the Linux filesystem builds significantly faster than one with volumes pointing to Windows directories.
Advanced Configuration Tips
Beyond basic setup, several configuration options optimize WSL2 for serious development work. These settings address memory usage, GPU access, and GUI application support.
Memory Configuration with .wslconfig
WSL2 automatically allocates up to 50% of your system memory and 25% of available swap by default. For systems with large amounts of RAM, this might allocate more than necessary. For systems with limited RAM, you might want to restrict WSL2’s memory usage more aggressively.
Create a .wslconfig file in your Windows user profile directory (C:UsersYourUsername.wslconfig) to customize resource limits:
[wsl2]memory=4GBprocessors=2swap=2GBlocalhostForwarding=true
These settings limit WSL2 to 4GB of RAM, 2 CPU cores, and 2GB of swap. Adjust values based on your system resources. Developer forum discussions suggest 4-8GB works well for most development workloads on systems with 16GB or more total RAM.
After modifying .wslconfig, restart WSL2 to apply changes:
wsl --shutdown
Then open your Linux distribution again to start it with the new configuration.
GPU Acceleration for Machine Learning
WSL2 supports GPU acceleration for CUDA and machine learning workloads. This feature, available on Windows 11 and recent Windows 10 builds, allows TensorFlow, PyTorch, and other frameworks to use your NVIDIA GPU directly from Linux applications.
Install the latest NVIDIA drivers on Windows (not inside Linux). NVIDIA’s drivers now include WSL2 GPU support automatically. Verify GPU access from inside WSL2:
nvidia-smi
This command displays your GPU details and current utilization. If it works, your GPU is accessible from Linux. Install CUDA toolkit and ML frameworks inside WSL2, and they’ll automatically use your GPU for acceleration.
GUI Applications with WSLg
Windows 11 and recent Windows 10 builds include WSLg (Windows Subsystem for Linux GUI), which runs Linux GUI applications directly on Windows. Install any GUI application inside WSL2:
sudo apt install gedit
Launch it from the command line:
gedit &
The application window appears on your Windows desktop. No additional configuration required. This works for IDEs, browsers, database GUI tools, and virtually any Linux GUI application. Audio and clipboard integration work seamlessly between Linux GUI apps and Windows.
Best Practices for WSL2 Development
Following established best practices when configuring WSL2 on Windows for a full Linux development environment ensures smooth daily operation. These guidelines emerge from extensive community experience and address the most common friction points.
File Storage Performance Comparison
Understanding performance characteristics helps you make informed decisions about project organization. The Linux filesystem inside WSL2 provides the fastest performance because it uses the ext4 filesystem on a virtual disk with direct kernel access. Windows drives mounted at /mnt/c/ require translation between filesystems, introducing overhead.
For typical web development with npm, Yarn, or pip, store projects on the Linux filesystem. Database files should also reside on the Linux filesystem for Docker and native database installations. Only use Windows drives for files you need to edit with Windows-exclusive applications or share with Windows users who don’t use WSL.
Memory Management
WSL2 doesn’t immediately release memory back to Windows when you close applications inside Linux. The Linux kernel holds onto allocated memory for caching and reuse. If you run memory-intensive operations like large compilations, then switch to Windows applications, you might notice Windows running low on available memory.
Manually free memory by running this command inside WSL2:
echo 1 | sudo tee /proc/sys/vm/drop_caches
This drops the page cache, freeing memory for Windows applications. For automatic memory management, consider tools that monitor WSL2 memory usage and trigger cache clearing when necessary.
If you frequently switch between WSL2-heavy work and Windows-heavy work, set conservative memory limits in .wslconfig. This prevents WSL2 from claiming too much RAM that Windows applications might need.
Cross-OS Tool Usage
WSL2 lets you call Windows executables from Linux and vice versa. Use Windows paths with the .exe extension from WSL2:
/mnt/c/Users/YourName/AppData/Local/Programs/Microsoft VS Code/bin/code .
However, mixing Windows and Linux tools on the same files can cause issues. Line endings differ between operating systems. Windows uses CRLF while Linux uses LF. File permissions don’t translate perfectly across the boundary. For best results, use Linux tools on Linux-hosted files and Windows tools on Windows-hosted files.
The one exception is VS Code. The WSL extension handles the boundary gracefully, running the editor on Windows while maintaining a Linux-side workspace. Trust Microsoft’s tooling for cross-boundary operations, but be cautious with other combinations.
Common Pitfalls to Avoid
Several mistakes cause ongoing problems for developers new to WSL2. First, avoid storing project files with deep directory structures on Windows drives if you’ll access them from Linux. Windows has a 260-character path limit by default, and combined with the /mnt/c/ prefix, you can exceed this limit quickly in large projects.
Second, don’t modify Linux files from Windows applications. The files exist inside a virtual disk image that Windows sees through a special driver. Direct edits from Windows applications can corrupt the filesystem or cause synchronization issues. Edit files either from Linux tools or through the \wsl$ network path, but not by modifying the virtual disk file directly.
Third, remember that WSL2 has no systemd by default. Services don’t automatically start on boot. Use service management approaches appropriate for WSL2, such as manually starting services or using supervisor tools like pm2 for Node.js applications.
Troubleshooting Common Issues
Even with careful setup, issues arise. Here are solutions to the most common problems developers encounter when configuring WSL2 on Windows for a full Linux development environment.
WSL2 Not Starting
If WSL2 fails to start, first check that virtualization is enabled in BIOS/UEFI. Without hardware virtualization support, WSL2 cannot run. Re-enter BIOS setup and verify Intel VT-x or AMD-V is enabled.
Second, verify the Virtual Machine Platform Windows feature is active. Open PowerShell as Administrator and run:
Enable-WindowsOptionalFeature -Online -FeatureName VirtualMachinePlatform -All
Restart if prompted, then try launching WSL2 again.
Third, check for conflicting hypervisors. If you have other virtualization software installed, it might interfere with WSL2. Some users report conflicts with older VirtualBox versions. Update to the latest versions of all virtualization tools.
Docker Connectivity Problems
When Docker commands fail from inside WSL2, verify Docker Desktop is running on Windows. Check that WSL2 integration is enabled in Docker Desktop settings for your specific Linux distribution. Toggle it off and on to reset the connection.
Network connectivity issues often stem from VPN software. Some VPN clients reroute Docker’s network traffic incorrectly. Try disconnecting from VPN and testing whether Docker works. If it does, configure your VPN to exclude Docker’s network ranges.
Reset Docker Desktop entirely if problems persist. Right-click the Docker Desktop icon in the system tray and select “Troubleshoot” then “Reset to factory defaults.” Note this removes all containers and images, requiring you to rebuild from scratch.
Permission Issues
Permission errors when accessing files across the Windows-Linux boundary occur frequently. Files created on Windows drives inherit Windows permissions, which don’t map perfectly to Linux permissions. You might see “Permission denied” errors when trying to execute scripts or write to directories.
For project files, move them to the Linux filesystem to avoid permission issues entirely. For files you must access from both operating systems, set broad permissions:
chmod -R 777 /mnt/c/path/to/directory
This grants full permissions to everyone, which is insecure for sensitive files but works for development projects. Adjust permissions more restrictively for production or security-sensitive contexts.
Performance Optimization Steps
If WSL2 feels sluggish, check your memory allocation. WSL2 running near its memory limit spends time swapping to disk. Increase the memory limit in .wslconfig if you have available RAM, or close memory-intensive applications.
Verify project files reside on the Linux filesystem. Moving a project from /mnt/c/ to ~/ can instantly double or triple performance for file-heavy operations. This single change often resolves performance complaints.
Disable Windows Defender real-time scanning for the WSL2 virtual disk location. Windows Defender scans every file access, adding overhead. Add an exclusion for C:UsersYourUsernameAppDataLocalPackagesCanonicalGroupLimited.Ubuntu*LocalState (adjust for your specific distribution). This improves performance significantly for file-heavy operations.
Frequently Asked Questions
Should I use WSL for development?
Yes, WSL2 is excellent for development if you need Linux tools but prefer Windows as your primary operating system. It provides native Linux performance for command-line tools, seamless integration with VS Code, and eliminates the need for dual-booting. Developers report 40-60% faster build times compared to running equivalent tools natively on Windows, making it particularly valuable for web development, containerization, and cross-platform projects.
Can I run Linux on Windows using WSL?
Yes, WSL (Windows Subsystem for Linux) runs a complete Linux environment directly on Windows. WSL2, the current version, uses a real Linux kernel in a lightweight virtual machine, providing near-native performance. You can run Linux command-line tools, install packages with apt or other package managers, and even run GUI applications with WSLg on supported Windows versions.
Can I use WSL2 on Windows?
Yes, WSL2 works on Windows 10 version 2004 and later (build 19041+) and all versions of Windows 11. You need hardware virtualization enabled in your BIOS/UEFI settings. Most modern computers support this feature, though you may need to enable it manually in your motherboard’s firmware settings if it’s disabled by default.
Is WSL better for development?
WSL2 is often better for development when you need Linux tools but want to keep using Windows applications. It offers faster file system performance for Linux tools than native Windows, seamless Docker integration, and consistent environments with production Linux servers. However, for Windows-specific development like .NET applications, native Windows tools remain preferable. The best choice depends on your specific technology stack.
What are the limitations of WSL2?
WSL2 has several limitations: it doesn’t use systemd by default so services don’t auto-start on boot, networking works differently than native Linux which complicates some server setups, file system performance degrades when accessing Windows drives, and some kernel-level security tools don’t work. Additionally, it requires hardware virtualization support and uses more memory than WSL1. Despite these limitations, WSL2 works excellently for most development workflows.
Is WSL basically a Linux VM?
WSL2 is technically a lightweight virtual machine with a Linux kernel, but with key differences from traditional VMs. It boots in seconds instead of minutes, shares resources dynamically with Windows instead of allocating fixed amounts, integrates deeply with Windows file system and networking, and doesn’t require a separate Linux desktop environment. The integration makes it feel more like running Linux applications directly on Windows rather than managing a separate virtual machine.
Does WSL slow down my computer?
WSL2 uses memory and CPU resources that could otherwise go to Windows applications. By default, it can use up to 50% of your RAM. However, when idle, it releases most resources back to Windows. If you run memory-intensive builds or compile large projects, you might notice Windows applications slowing temporarily. You can limit WSL2’s memory usage in the .wslconfig file to prevent it from consuming too many resources, and the impact is minimal for most development workflows.
Why are people leaving Windows for Linux?
Many developers move to Linux for better native support of development tools, faster file system performance, more control over their operating system, privacy concerns about Windows telemetry, and the ability to customize every aspect of their environment. However, WSL2 provides most of these Linux benefits without requiring users to actually leave Windows. Developers who need Windows applications for work or personal use can now access Linux tools without sacrificing their familiar Windows environment or managing complex dual-boot setups.
Conclusion
Configuring WSL2 on Windows for a full Linux development environment transforms how you work as a developer. You get the performance of native Linux tools, the convenience of Windows applications, and the productivity of seamless integration between both worlds. By following the steps in this guide, you’ve set up a professional development environment that serves you well for years.
Start with the basics: install WSL2, configure your terminal, and set up VS Code. Then expand into Docker, version managers, and advanced configurations as your needs grow. Store projects on the Linux filesystem for maximum performance, and don’t hesitate to experiment with multiple Linux distributions. Your new hybrid Windows-Linux workflow is ready for serious development work in 2026 and beyond.