
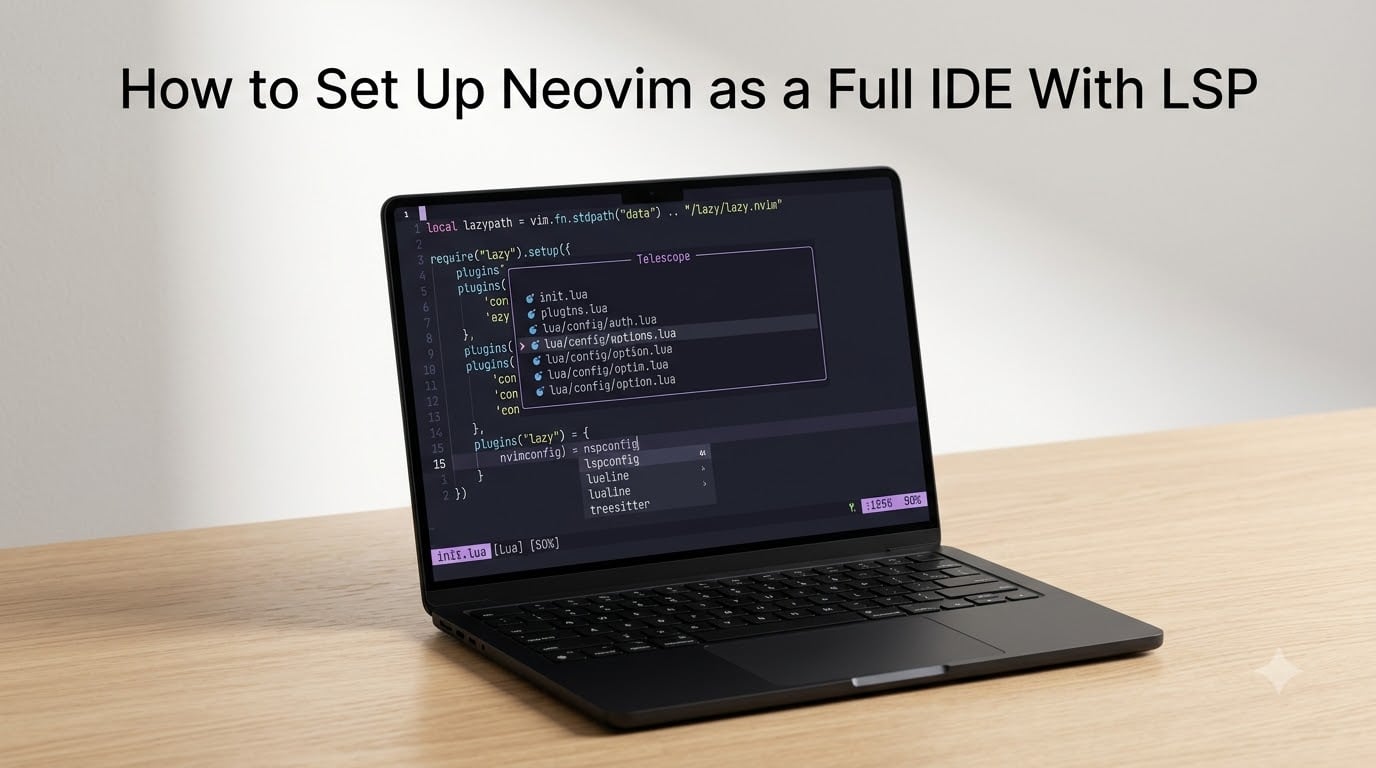
I have been using Neovim as my daily driver for over three years, and the moment everything clicked was when I got the Language Server Protocol running. Suddenly my terminal editor had autocomplete, go-to-definition, and live diagnostics that rivaled VS Code. That is exactly what I will walk you through in this guide.
By the end of this tutorial, you will know how to set up Neovim as a full IDE with LSP from a clean install to a fully working development environment. We will cover plugin management, language server configuration, autocompletion, syntax highlighting, and fuzzy finding.
This guide uses Neovim 0.11+ and the modern Lua API. I will include copy-paste-ready configuration files so you can get up and running in under an hour.
Table of Contents
- What Is LSP and Why It Matters for Neovim?
- Prerequisites and Installation
- How to Set Up Neovim as a Full IDE With LSP?
- Step 1: Set Up lazy.nvim as Your Plugin Manager
- Step 2: Configure LSP With nvim-lspconfig and mason.nvim
- Step 3: Add Completion With nvim-cmp
- Step 4: Enable Treesitter for Syntax Highlighting
- Step 5: Set Up Telescope for Fuzzy Finding
- Essential LSP Keybindings Reference
- Native LSP vs Plugin-Based: Which Approach to Choose
- Troubleshooting Common LSP Issues
- Frequently Asked Questions
- Conclusion
What Is LSP and Why It Matters for Neovim?
The Language Server Protocol (LSP) is a standardized communication protocol originally created by Microsoft for VS Code. It defines how an editor talks to a language server, a separate background process that understands your code. The server analyzes your files and sends back intelligence: completions, errors, symbol locations, and hover documentation.
Neovim ships with a built-in LSP client, meaning it does not need a third-party plugin to connect to language servers. It just needs configuration to tell it which servers to start and how to attach them to your files.
Once LSP is active, you get the features people typically associate with full IDEs like IntelliJ or Visual Studio:
Autocomplete suggestions based on your actual codebase
Real-time diagnostics (errors and warnings as you type)
Go-to-definition and find-references navigation
Hover documentation for functions and types
Symbol renaming across your entire project
Code actions like quick fixes and refactors
The difference is that you get all of this inside Neovim’s fast, keyboard-driven, modal editing environment. Users on Reddit’s r/neovim consistently report 2 to 5x faster startup times compared to VS Code, and the editor never feels sluggish even on large projects.
Prerequisites and Installation
Before we write any configuration, you need a few tools installed on your system. I recommend installing everything through your system package manager.
Required software:
Neovim 0.11 or later (this guide targets the 0.11+ API)
Git (for plugin management and version control)
A C compiler like gcc or clang (Treesitter needs this to compile parsers)
Node.js and npm (many language servers are Node-based)
ripgrep (for Telescope’s live grep to work properly)
A Nerd Font installed and set in your terminal (for icons)
Install Neovim on macOS:
brew install neovim ripgrep node gitInstall Neovim on Ubuntu/Debian:
sudo apt update
sudo apt install neovim ripgrep nodejs npm git build-essential
Verify your installation by running nvim --version in your terminal. You should see version 0.11.0 or higher listed at the top. If your package manager ships an older version, use the official AppImage or build from source.
How to Set Up Neovim as a Full IDE With LSP?
Now we get into the actual setup. We will build your Neovim configuration step by step, starting with the directory structure and plugin manager, then adding LSP, completion, Treesitter, and Telescope.
Your configuration lives in Lua files. On Linux and macOS, the entry point is ~/.config/nvim/init.lua. On Windows, it is %LOCALAPPDATA%nviminit.lua.
Here is the directory structure we will create:
~/.config/nvim/
├── init.lua           -- Entry point
└── lua/
    ├── core/
    │   ├── options.lua    -- Editor settings
    │   └── keymaps.lua    -- Custom key mappings
    └── plugins/
        ├── lsp.lua        -- LSP configuration
        ├── cmp.lua        -- Completion setup
        ├── treesitter.lua -- Syntax highlighting
        └── telescope.lua  -- Fuzzy finder
For this guide, I will put everything inline in init.lua to keep it simple. You can split it into separate files later as your config grows.
Step 1: Set Up lazy.nvim as Your Plugin Manager
lazy.nvim is the modern standard for managing Neovim plugins. It loads plugins asynchronously, which keeps your startup time fast. I switched to it from packer.nvim two years ago and never looked back.
Create your init.lua file and add this bootstrap code:
-- ~/.config/nvim/init.lua

-- Bootstrap lazy.nvim
local lazypath = vim.fn.stdpath("data") .. "/lazy/lazy.nvim"
if not (vim.uv or vim.loop).fs_stat(lazypath) then
  vim.fn.system({
    "git", "clone", "--filter=blob:none",
    "https://github.com/folke/lazy.nvim.git",
    "--branch=stable",
    lazypath,
  })
end
vim.opt.rtp:prepend(lazypath)
This snippet downloads lazy.nvim on first launch if it is not already present. After the bootstrap, add your plugin specifications and the call to load them:
-- Define plugins
require("lazy").setup({
  -- LSP
  { "neovim/nvim-lspconfig" },
  { "williamboman/mason.nvim" },
  { "williamboman/mason-lspconfig.nvim" },

  -- Completion
  { "hrsh7th/nvim-cmp" },
  { "hrsh7th/cmp-nvim-lsp" },
  { "hrsh7th/cmp-buffer" },
  { "hrsh7th/cmp-path" },
  { "L3MON4D3/LuaSnip" },

  -- Treesitter
  { "nvim-treesitter/nvim-treesitter", build = ":TSUpdate" },

  -- Telescope
  { "nvim-telescope/telescope.nvim", dependencies = { "nvim-lua/plenary.nvim" } },
})
Restart Neovim. lazy.nvim will automatically download and install every plugin listed. You can run :Lazy at any time to see plugin status and updates.
Step 2: Configure LSP With nvim-lspconfig and mason.nvim
This is the core step. nvim-lspconfig provides sensible default configurations for over 200 language servers. mason.nvim lets you install those servers with a single command inside Neovim. Together, they make LSP setup almost effortless.
Add this configuration block after your lazy.nvim setup:
-- mason.nvim: package manager for LSP servers
require("mason").setup()
require("mason-lspconfig").setup({
  ensure_installed = { "lua_ls", "ts_ls", "pyright" },
})

-- Basic options for LSP completion
local capabilities = require("cmp_nvim_lsp").default_capabilities()

-- Configure individual language servers
require("lspconfig").lua_ls.setup({
  capabilities = capabilities,
  settings = {
    Lua = { diagnostics = { globals = { "vim" } } },
  },
})

require("lspconfig").ts_ls.setup({ capabilities = capabilities })
require("lspconfig").pyright.setup({ capabilities = capabilities })
This sets up three popular language servers out of the box: lua_ls for Lua (including your Neovim config), ts_ls for TypeScript and JavaScript, and pyright for Python.
Neovim 0.11 native API note: If you prefer the newest approach without lspconfig, Neovim 0.11 introduced vim.lsp.config() and vim.lsp.enable(). This lets you define server configs as Lua files in ~/.config/nvim/lsp/ and enable them natively. I cover this approach in the comparison section below.
Understanding root_markers: The LSP client needs to find the root of your project to know where to start analyzing. It uses root_markers to detect project boundaries. For example, a package.json marks a Node.js project root, and a .git directory marks a general project root. nvim-lspconfig handles this automatically for most servers, but you can override it if needed.
Attaching keybindings on LspAttach: Your LSP keybindings should only be active when a language server is attached to your buffer. Use the LspAttach autocmd for this:
-- LSP keybindings (active when a server attaches)
vim.api.nvim_create_autocmd("LspAttach", {
  callback = function(event)
    local opts = function(desc)
      return { buffer = event.buf, desc = "LSP: " .. desc }
    end

    vim.keymap.set("n", "gd", vim.lsp.buf.definition, opts("Go to definition"))
    vim.keymap.set("n", "gr", vim.lsp.buf.references, opts("Find references"))
    vim.keymap.set("n", "K", vim.lsp.buf.hover, opts("Hover documentation"))
    vim.keymap.set("n", "rn", vim.lsp.buf.rename, opts("Rename symbol"))
    vim.keymap.set("n", "ca", vim.lsp.buf.code_action, opts("Code action"))
    vim.keymap.set("n", "gD", vim.lsp.buf.declaration, opts("Go to declaration"))
    vim.keymap.set("n", "gi", vim.lsp.buf.implementation, opts("Go to implementation"))
  end,
})
To install additional language servers, run :Mason inside Neovim. This opens an interactive panel where you can search for and install any supported server, linter, or formatter.
Step 3: Add Completion With nvim-cmp
LSP provides the intelligence, but you need a completion engine to display suggestions as you type. nvim-cmp is the standard choice, and it supports multiple completion sources: LSP, buffer text, file paths, and snippets.
Add this configuration to your init.lua:
-- nvim-cmp setup
local cmp = require("cmp")
local luasnip = require("luasnip")

cmp.setup({
  snippet = {
    expand = function(args)
      luasnip.lsp_expand(args.body)
    end,
  },
  mapping = cmp.mapping.preset.insert({
    [""] = cmp.mapping.complete(),
    [""] = cmp.mapping.confirm({ select = true }),
    [""] = cmp.mapping(function(fallback)
      if cmp.visible() then
        cmp.select_next_item()
      elseif luasnip.expand_or_jumpable() then
        luasnip.expand_or_jump()
      else
        fallback()
      end
    end, { "i", "s" }),
    [""] = cmp.mapping(function(fallback)
      if cmp.visible() then
        cmp.select_prev_item()
      elseif luasnip.jumpable(-1) then
        luasnip.jump(-1)
      else
        fallback()
      end
    end, { "i", "s" }),
  }),
  sources = cmp.config.sources({
    { name = "nvim_lsp" },
    { name = "luasnip" },
    { name = "path" },
    { name = "buffer" },
  }),
})
Now when you type in insert mode, you will see a completion menu populated with suggestions from your LSP server. Press Tab to cycle through items and Enter to confirm.
I found that pairing nvim-cmp with LuaSnip gives you the best snippet expansion experience. You can write your own snippets in Lua or install a snippet collection like friendly-snippets.
Step 4: Enable Treesitter for Syntax Highlighting
Treesitter gives Neovim a structural understanding of your code. Instead of relying on regex-based syntax highlighting, it builds a syntax tree for each buffer. The result is more accurate highlighting that understands context.
Add this configuration:
-- Treesitter setup
require("nvim-treesitter.configs").setup({
  ensure_installed = {
    "lua", "vim", "vimdoc", "query",
    "javascript", "typescript", "tsx",
    "python", "html", "css", "json", "yaml",
  },
  highlight = { enable = true },
  indent = { enable = true },
})
Restart Neovim and Treesitter will download and compile parsers for every language in your ensure_installed list. The first run takes a few seconds since it compiles C code for each parser.
The visual improvement is immediately noticeable. Function names, type annotations, and keywords all get distinct, context-aware coloring that plain Vim syntax files simply cannot match.
Step 5: Set Up Telescope for Fuzzy Finding
Telescope is a highly extendable fuzzy finder built for Neovim. You can search files, text content, git commits, LSP references, and much more. It is the tool I use most frequently throughout the day.
Add this configuration and set of keybindings:
-- Telescope setup
require("telescope").setup()

-- Telescope keybindings
local builtin = require("telescope.builtin")
vim.keymap.set("n", "ff", builtin.find_files, { desc = "Find files" })
vim.keymap.set("n", "fg", builtin.live_grep, { desc = "Live grep" })
vim.keymap.set("n", "fb", builtin.buffers, { desc = "Find buffers" })
vim.keymap.set("n", "fh", builtin.help_tags, { desc = "Help tags" })
vim.keymap.set("n", "fs", builtin.lsp_document_symbols, { desc = "Document symbols" })
vim.keymap.set("n", "fS", builtin.lsp_workspace_symbols, { desc = "Workspace symbols" })
Press <leader>ff to fuzzy-find any file in your project. Press <leader>fg to search across all file contents instantly. These two bindings alone replaced five separate tools I used to rely on.
Telescope requires ripgrep for live_grep to work, which is why we installed it in the prerequisites step.
Essential LSP Keybindings Reference
Here is a quick reference for the LSP keybindings we configured. Keep this handy while you build muscle memory.
Navigation keybindings:
gd– Go to definitiongD– Go to declarationgi– Go to implementationgr– Find references (opens in Telescope if installed)
Information keybindings:
K– Show hover documentation<leader>ca– Open code actions menu<leader>rn– Rename symbol under cursor
Completion keybindings (insert mode):
Ctrl-Space– Manually trigger completionTab/Shift-Tab– Next / previous suggestionEnter– Confirm selection
Telescope keybindings:
<leader>ff– Find files<leader>fg– Live grep across project<leader>fb– Switch between open buffers<leader>fs– Jump to document symbols
If you are not sure what your leader key is, Neovim defaults to backslash. Most users remap it to space, which you can do with vim.g.mapleader = " " at the top of your config.
Native LSP vs Plugin-Based: Which Approach to Choose
One of the biggest sources of confusion in the Neovim community is choosing between the plugin-based approach (nvim-lspconfig) and the native approach (vim.lsp.config). This confusion comes up constantly on Reddit and in GitHub discussions.
The plugin-based approach uses nvim-lspconfig to provide ready-made server configurations. You call require("lspconfig").server_name.setup() and everything works. This is the easiest path for beginners and handles edge cases for over 200 servers.
The native approach was introduced in Neovim 0.11. You create Lua files in ~/.config/nvim/lsp/, one per server, and call vim.lsp.enable("server_name"). This requires zero plugins and is the most minimal setup possible.
Here is what a native LSP config file looks like. Create ~/.config/nvim/lsp/luals.lua:
-- ~/.config/nvim/lsp/luals.lua
return {
  cmd = { "lua-language-server" },
  filetypes = { "lua" },
  root_markers = { ".luarc.json", ".git" },
  settings = {
    Lua = { diagnostics = { globals = { "vim" } } },
  },
}
Then enable it in your init.lua with vim.lsp.enable("luals").
My recommendation: Start with nvim-lspconfig and mason.nvim. It handles the complex configuration details for you and makes installing servers trivial. Once you understand how LSP works, you can migrate to the native approach for a more minimal setup.
If you want a zero-configuration experience, consider starting with a distribution like LazyVim or NvChad. These come preconfigured with LSP, completion, Treesitter, and Telescope out of the box. Many community members on r/neovim recommend this path for newcomers.
Troubleshooting Common LSP Issues
LSP setup rarely works perfectly on the first try. Here are the most common issues people hit and how I fix them.
Issue: Language server not starting. Run :LspInfo (or :checkhealth lsp in Neovim 0.11+) to see which servers are attached to your current buffer. If nothing is listed, the server may not be installed. Open :Mason and check if the server appears in your installed list. Also verify your file type is recognized with :set ft?.
Issue: Autocompletion not appearing. Make sure you added capabilities = require("cmp_nvim_lsp").default_capabilities() to every server’s setup call. Without this, nvim-cmp cannot receive completion data from the LSP server. Also confirm that nvim-lspconfig is listed as a source in your cmp setup.
Issue: Go-to-definition opens a blank buffer. This usually means your root_markers are not being detected. The server does not know where your project root is, so it cannot resolve symbols correctly. Check if you have a .git directory or a project config file like package.json or pyproject.toml in your project root.
Issue: Server crashes on startup. Run :LspLog to open the log file for all running servers. Look for error messages about missing dependencies or incorrect paths. Many servers need specific runtimes installed (Node.js for ts_ls, Python for pyright) in your system PATH.
Issue: Diagnostics not showing. Neovim 0.11+ changed how virtual text and signs are displayed. Make sure you have not disabled diagnostics accidentally. Run vim.diagnostic.enable() in your config or check that vim.diagnostic.config() has not turned off virtual text.
General tip: Always run :checkhealth after installation. It checks your Neovim environment for common issues and gives you specific fix recommendations for anything that is missing.
Frequently Asked Questions
How to set up LSP for neovim?
Install the nvim-lspconfig and mason.nvim plugins using lazy.nvim, run :Mason to install your desired language servers, then call require(‘lspconfig’).server_name.setup() for each server. Attach keybindings using the LspAttach autocmd. The entire setup takes about 30 minutes with a copy-paste config.
What is the best LSP for Neovim?
There is no single best LSP because each language has its own server. For Lua use lua_ls, for TypeScript and JavaScript use ts_ls, for Python use pyright or basedpyright, for Rust use rust_analyzer, and for Go use gopls. Mason.nvim lets you install all of them from inside Neovim.
What does an LSP do in Neovim?
An LSP (Language Server Protocol) server connects to Neovim and provides IDE features like autocomplete, real-time diagnostics, go-to-definition, find references, hover documentation, symbol renaming, and code actions. It transforms Neovim from a text editor into a full development environment.
Why use neovim instead of vim?
Neovim has a built-in LSP client, native Lua scripting, a modern plugin ecosystem with lazy.nvim, Treesitter integration, and an active community building modern tooling. Vim lacks these features without heavy configuration. Neovim also runs faster in the terminal and supports the same modal editing workflows you already know.
Conclusion
Learning how to set up Neovim as a full IDE with LSP transforms your editing experience. You now have a terminal-based development environment with autocomplete, real-time diagnostics, code navigation, and fuzzy finding, all driven by keyboard shortcuts.
The five steps we covered give you everything you need: lazy.nvim for plugin management, nvim-lspconfig and mason.nvim for LSP, nvim-cmp for completion, Treesitter for syntax highlighting, and Telescope for fast file searching.
Start with the copy-paste config from this guide and customize it over time. Run :checkhealth if anything breaks, and use :Mason to add new language servers as you work with different languages. Once you are comfortable, explore the native vim.lsp.config() API for a more minimal setup, or try a distribution like LazyVim to see how experienced users structure their configurations.