
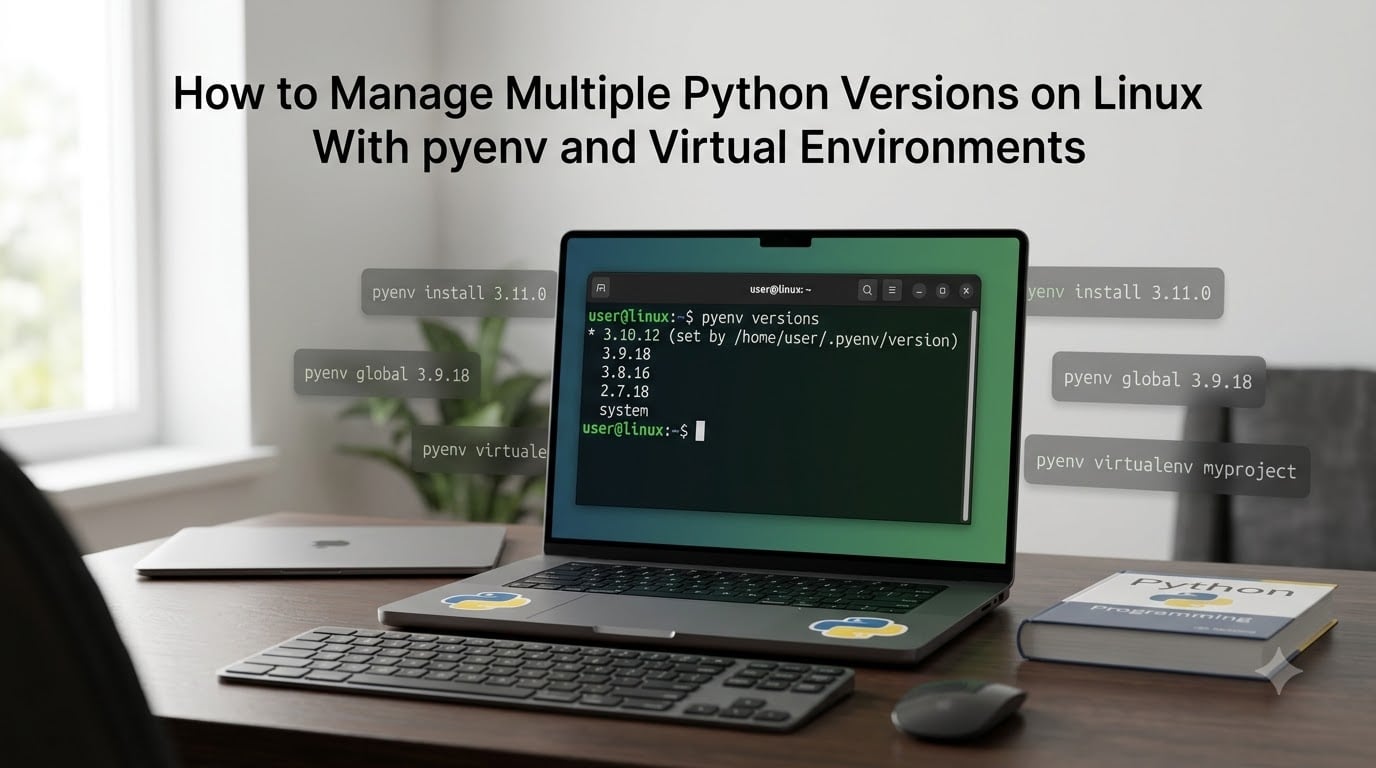
If you have ever tried running a legacy Django project that needs Python 3.8 on the same machine where your newest FastAPI app requires Python 3.12, you already know the pain. Your Linux distribution ships with one system Python, and messing with it can break package managers and system utilities. That is exactly the problem pyenv solves, and in this guide I will walk you through every step to manage multiple Python versions on Linux with pyenv and virtual environments.
I have spent years setting up Python development environments across Ubuntu, Fedora, and Arch machines. The combination of pyenv for version management and pyenv-virtualenv for isolated environments has become my go-to workflow. By the end of this article, you will have a clean, reproducible setup that lets you switch between Python versions effortlessly and create isolated virtual environments for every project.
Here is what we will cover: why multiple Python versions cause problems, how pyenv works under the hood, the full installation process, shell configuration, installing and switching Python versions, creating virtual environments, VS Code integration, troubleshooting build failures, and production considerations. Let me start with the problem itself.
Table of Contents
Why You Need to Manage Multiple Python Versions on Linux?
Your Linux distribution depends on a specific Python version for system tasks. On Ubuntu, tools like apt, gnome-terminal, and various system services run on the system Python. If you overwrite it or upgrade it manually, you risk breaking your entire operating system. I have seen a developer accidentally upgrade system Python to 3.13 on Ubuntu 22.04 and lose the ability to use the terminal application entirely.
At the same time, real-world development demands flexibility. You might maintain a production service running Python 3.9, contribute to an open-source library that tests against Python 3.7 through 3.12, and experiment with the latest Python 3.13 features all on the same machine. Installing each of these at the system level is not practical and creates conflicts that are hard to untangle.
This is where pyenv comes in. It installs Python versions entirely in your user directory, completely separate from the system Python. You get the freedom to install any CPython, PyPy, or Stackless version without touching a single system file. Each project can declare its own Python version, and pyenv handles the switching automatically.
The forum discussions on r/Python and discuss.python.org consistently highlight the same recommendation: use pyenv over manually compiling Python or relying on Homebrew’s Python, because it keeps the system Python clean while giving you per-project control. Users repeatedly report that after switching to pyenv, they never deal with version conflicts again.
How pyenv Works: Shims and Version Resolution?
Understanding how pyenv works internally will save you hours of debugging later. The entire system relies on two concepts: shims and version resolution.
Shims are lightweight executable files that pyenv places at the front of your PATH. When you run python, pip, or any other Python-related command, the shim intercepts that call first. The shim then determines which Python version should handle the request and passes the command to that specific version. This interception is transparent to you as a user, but it is the mechanism that makes version switching feel instantaneous.
When pyenv installs a Python version, it compiles the full CPython interpreter from source and places it inside ~/.pyenv/versions/. The PYENV_ROOT environment variable points to this directory, which defaults to ~/.pyenv. Every shim knows to look there for installed versions.
After you install or remove a Python version, pyenv runs a process called rehashing. This updates all the shims to reflect the currently available versions. You can trigger this manually with pyenv rehash, though pyenv also does it automatically after install and uninstall operations.
Version resolution follows a strict priority order, and understanding this hierarchy is the key to avoiding confusion:
Shell version (highest priority) — Set with pyenv shell 3.12.0. This applies only to the current shell session and is stored in the PYENV_VERSION environment variable.
Local version — Set with pyenv local 3.11.5. This writes a .python-version file in the current directory. Whenever you cd into that directory, pyenv automatically switches to that version.
Global version (lowest priority) — Set with pyenv global 3.12.0. This is the default version used when no shell or local version overrides it. It is stored in ~/.pyenv/version.
If none of these are set, pyenv falls back to the system Python. This fallback ensures you never break your system by default, which is one of the most appreciated design decisions in the community.
Installing pyenv on Linux
The installation process has two phases: installing build dependencies and getting pyenv itself. Skip the dependencies and you will hit build failures almost immediately, which is the number one pain point reported by new users on Reddit and Stack Overflow.
Step 1: Install Build Dependencies
pyenv compiles Python from source, so your system needs the right compilers and development libraries. The exact packages differ by distribution.
For Debian, Ubuntu, and Mint:
sudo apt update
sudo apt install -y make build-essential libssl-dev zlib1g-dev
  libbz2-dev libreadline-dev libsqlite3-dev wget curl llvm
  libncursesw5-dev xz-utils tk-dev libxml2-dev libxmlsec1-dev
  libffi-dev liblzma-dev
For Fedora, CentOS, and RHEL:
sudo dnf install -y make gcc gcc-c++ zlib-devel bzip2-devel
  readline-devel sqlite-devel openssl-devel tk-devel
  libffi-devel xz-devel libxml2-devel libxmlsec1-devel
For Arch Linux and Manjaro:
sudo pacman -S --needed base-devel openssl zlib bzip2
  readline sqlite tk xz libffi
I recommend running these commands even if you think your system already has some packages installed. Package managers skip what is already present, so there is no harm in being thorough. Missing even one library can cause subtle build failures where Python compiles but lacks support for SSL, SQLite, or compression.
Step 2: Install pyenv
The recommended way to install pyenv is via the automatic installer, which handles cloning the repository and setting up directory structure:
curl https://pyenv.run | bashThis command clones the pyenv repository along with the pyenv-virtualenv and pyenv-update plugins into ~/.pyenv. If you prefer to do it manually, you can clone the repository directly:
git clone https://github.com/pyenv/pyenv.git ~/.pyenv
git clone https://github.com/pyenv/pyenv-virtualenv.git ~/.pyenv/plugins/pyenv-virtualenv
Either approach works. The automatic installer is faster, but the manual clone gives you more control and lets you inspect what is being installed before running it, which some security-conscious teams prefer.
Configuring Your Shell for pyenv
After installation, pyenv needs to be initialized in your shell. This step is where most users encounter the dreaded “pyenv: command not found” error, and it always traces back to incomplete shell configuration.
For Bash Users
Add the following lines to your ~/.bashrc file:
export PYENV_ROOT="$HOME/.pyenv"
export PATH="$PYENV_ROOT/bin:$PATH"
eval "$(pyenv init -)"
eval "$(pyenv virtualenv-init -)"
The first two lines set the PYENV_ROOT variable and add pyenv’s bin directory to your PATH. The third line initializes the shim system. The fourth line enables automatic activation of virtual environments when you enter a directory with a .python-version file.
For Zsh Users
If you use Zsh, which is the default on recent versions of macOS and many Linux configurations, add the same lines to your ~/.zshrc file instead:
export PYENV_ROOT="$HOME/.pyenv"
export PATH="$PYENV_ROOT/bin:$PATH"
eval "$(pyenv init - zsh)"
eval "$(pyenv virtualenv-init - zsh)"
After editing your shell configuration file, restart your shell for the changes to take effect:
exec "$SHELL"Verify the installation by checking the pyenv version:
pyenv --versionIf this prints a version number, you are good to go. If you get “command not found”, double-check that ~/.pyenv/bin is in your PATH and that you restarted the shell properly. On some systems, particularly those using login shells, you may need to add the lines to ~/.bash_profile or ~/.profile instead of ~/.bashrc.
Installing and Managing Python Versions With pyenv
With pyenv installed and configured, you can now install any Python version you need. The process is straightforward once you know the commands.
Listing Available Versions
To see all Python versions available for installation, run:
pyenv install --listThis outputs hundreds of entries, including CPython releases, PyPy versions, Stackless Python, and even miniconda distributions. The list is long, so you might want to filter it:
pyenv install --list | grep " 3.12"This shows only Python 3.12.x versions. Replace the pattern as needed for whatever version you are looking for.
Installing a Python Version
To install a specific version, use the install command with the exact version string from the list:
pyenv install 3.12.0Building Python from source takes a few minutes depending on your machine. On a modern quad-core processor, expect about three to five minutes. pyenv will display the build progress, and if everything succeeds, the version becomes immediately available.
You can install multiple versions in sequence:
pyenv install 3.11.5
pyenv install 3.10.13
pyenv install 3.9.18
After installation, run pyenv rehash to update the shims. Recent versions of pyenv do this automatically, but running it manually does no harm and ensures consistency.
Viewing Installed Versions
To see which versions you have installed, use:
pyenv versionsThe output lists all installed versions with an asterisk marking the currently active one. The system entry refers to your distribution’s Python, which is always available as a fallback.
Uninstalling a Python Version
When you no longer need a version, remove it to free disk space, since each compiled Python uses roughly 300 to 400 MB:
pyenv uninstall 3.9.18pyenv asks for confirmation before removing. If the version is currently set as global or local, you will need to update that setting afterward.
Setting Global, Local, and Shell Python Versions
Installing Python versions is only half the work. The real power of pyenv comes from its three-level version management system, which lets you control which Python runs in different contexts.
Setting a Global Version
The global version is your default Python across the entire system. Set it once after installation:
pyenv global 3.12.0Now, whenever you open a terminal and there is no local or shell override, Python 3.12.0 is what runs. Verify it with:
python --version
# Python 3.12.0
I recommend setting a global version right after installation. Without it, pyenv falls back to the system Python, which can cause confusion if you expect your newly installed version to be active.
Setting a Local Version for a Project
This is where pyenv shines. Navigate to your project directory and set a local version:
cd ~/projects/legacy-django-app
pyenv local 3.8.18
This creates a file called .python-version in that directory containing 3.8.18. Every time you enter that directory, pyenv automatically switches to Python 3.8.18. Leave the directory, and it reverts to your global version.
The .python-version file is a plain text file containing just the version number. Commit it to version control so every developer on your team automatically uses the correct Python version. This single file eliminates the “works on my machine” problem for Python version mismatches.
Setting a Shell Version
For temporary use within a single terminal session, use the shell command:
pyenv shell 3.11.5This sets the PYENV_VERSION environment variable, overriding both local and global versions for as long as that shell is open. Close the terminal, and the override disappears. This is useful for quick tests where you want to run something against a different Python version without modifying any files.
To clear the shell version and fall back to local or global, run:
pyenv shell --unsetResolution Priority Summary
To summarize the priority order from highest to lowest: shell version beats local version, which beats global version, which beats system Python. When you run python, pyenv checks each level in order and uses the first one it finds.
Creating Virtual Environments With pyenv-virtualenv
Managing Python versions solves one problem, but you also need to isolate project dependencies. Two projects might both use Python 3.12 but require different versions of Django. That is where virtual environments come in, and pyenv-virtualenv integrates this seamlessly with pyenv’s version management.
Installing pyenv-virtualenv
If you used the curl https://pyenv.run | bash installer, pyenv-virtualenv is already installed. If not, clone it into the plugins directory:
git clone https://github.com/pyenv/pyenv-virtualenv.git
  ~/.pyenv/plugins/pyenv-virtualenv
Then add the initialization line to your shell configuration (as covered in the shell setup section):
eval "$(pyenv virtualenv-init -)"Restart your shell after making this change.
Creating a Virtual Environment
Creating a virtual environment with pyenv-virtualenv ties the environment to a specific Python version:
pyenv virtualenv 3.12.0 myproject-envThis creates a virtual environment named myproject-env based on Python 3.12.0. The environment appears in the pyenv versions list alongside your installed Python versions.
You can also create an environment using whatever Python version is currently active:
pyenv virtualenv myproject-envActivating and Deactivating
To manually activate the environment:
pyenv activate myproject-envTo deactivate it:
pyenv deactivateHowever, the real convenience comes from automatic activation. If you set a virtual environment as the local version for a project, pyenv-virtualenv activates and deactivates it automatically as you navigate directories:
cd ~/projects/myproject
pyenv local myproject-env
This writes myproject-env to the .python-version file. Now, whenever you enter the project directory, the environment activates automatically. Your prompt usually updates to show the active environment name. Leave the directory, and it deactivates just as automatically.
Listing and Removing Virtual Environments
Virtual environments appear in pyenv versions output and are also managed with pyenv virtualenvs, which shows only environments:
pyenv virtualenvsTo remove an environment you no longer need:
pyenv uninstall myproject-envOr use the virtualenv-specific command:
pyenv virtualenv-delete myproject-envBoth commands do the same thing. Choose whichever feels more natural to you.
pyenv vs venv vs conda: Choosing the Right Tool
One of the most common sources of confusion I see on forums is the relationship between pyenv, venv, and conda. People ask whether they need all three, just one, or some combination. The answer depends on what problem you are trying to solve.
pyenv is a Python version manager. Its job is installing and switching between different Python interpreter versions. It does not manage packages or create virtual environments on its own; that is what pyenv-virtualenv adds. Use pyenv when you need multiple Python interpreter versions on the same machine.
venv is Python’s built-in virtual environment module, available since Python 3.3. It creates isolated package environments for a single Python version. It does not install or manage Python versions. Use venv when you already have the right Python version installed and just need dependency isolation for a project.
conda is a combined package manager and environment manager that can install Python itself along with non-Python dependencies like C libraries, R packages, and CUDA toolkits. Use conda when you work in data science and need pre-compiled packages, or when your project requires non-Python system libraries that are difficult to build.
Here is how they compare directly. pyenv solves the version problem, venv solves the dependency isolation problem, and conda attempts to solve both plus binary package management. For most web and backend development, the pyenv plus pyenv-virtualenv combination is lighter, faster, and more transparent than conda. For scientific computing with heavy native dependencies, conda may save you significant time.
You can also combine them. A common pattern is to use pyenv for Python versions and venv for project environments instead of pyenv-virtualenv. After setting the local Python version with pyenv, create a standard venv inside the project:
pyenv local 3.12.0
python -m venv .venv
source .venv/bin/activate
This gives you pyenv’s version management with the standard library’s virtual environments, which some teams prefer because venv environments are more portable and do not depend on pyenv being installed.
VS Code Integration With pyenv
VS Code’s Python extension works beautifully with pyenv, but you need to tell it which interpreter to use. The integration is straightforward once you know where to look.
Selecting the Python Interpreter
Open the Command Palette with Ctrl+Shift+P and type “Python: Select Interpreter”. VS Code shows a list of all Python interpreters it detects, including those installed by pyenv. Select the one matching your project’s virtual environment.
If pyenv environments do not appear in the list, you can manually enter the path. pyenv virtual environments live in ~/.pyenv/versions/your-env-name/bin/python. You can find the exact path by running:
pyenv which pythonThis prints the full path to the active Python interpreter. Copy that path and paste it into the interpreter selection dialog.
Project-Level Configuration
For a more permanent setup, add the interpreter path to your project’s .vscode/settings.json file:
{
  "python.defaultInterpreterName": "myproject-env"
}
Alternatively, use the full path for maximum reliability:
{
  "python.defaultInterpreterName": "~/.pyenv/versions/myproject-env/bin/python"
}
With this configuration, every time you open the project in VS Code, it automatically uses the correct Python environment. The integrated terminal also respects pyenv’s local version, so if you have automatic activation enabled, opening a terminal in VS Code activates the environment just as it would in a standalone terminal.
Debugging and Testing
VS Code’s debugger and test runner both use the selected interpreter, so once you set it correctly, breakpoints, test discovery, and code completion all work with your pyenv-managed Python version. The Python extension also respects the .python-version file, so if you have one committed to your repository, VS Code picks up the version automatically.
Troubleshooting Common pyenv Build Failures
Build failures are the single most common issue new pyenv users face. The good news is that nearly every build failure traces back to one of a handful of missing dependencies. I have compiled this troubleshooting guide from forum reports, my own experience, and the patterns that appear repeatedly on r/Python.
Problem: “BUILD FAILED” With No Clear Error
When pyenv reports a build failure, it saves a detailed log file. Always check this log first:
/tmp/python-build.YYYYMMDDHHMMSS.PID.logpyenv prints the exact log path at the end of the failed output. Open it and look for the first error message, which is usually near the bottom of the file. The most common errors and their solutions follow.
Problem: SSL Module Failed or OpenSSL Errors
If the log contains errors about _ssl or OpenSSL, your system is missing or has an incompatible OpenSSL development library. On Debian and Ubuntu, install libssl-dev. On Fedora, install openssl-devel.
Python 3.10 and newer require OpenSSL 1.1.1 or later. If your distribution ships an older version, you need to compile OpenSSL from source and point pyenv to it. The pyenv wiki has a section on custom OpenSSL builds for this scenario. Alternatively, upgrade your distribution to one that ships OpenSSL 1.1.1 or later.
Problem: zlib.h Not Found
This error means the zlib development headers are missing. On Debian and Ubuntu, install zlib1g-dev. On Fedora, install zlib-devel. On Arch, install zlib. This is one of the most commonly missed dependencies because users assume zlib is included with the base system.
Without zlib, Python builds but lacks gzip and zip support, which breaks pip and many packages. Always include zlib development headers in your build dependencies.
Problem: “pyenv: command not found” After Installation
This error means pyenv is not in your PATH or your shell was not restarted. Verify that ~/.pyenv/bin exists and contains the pyenv executable. Then check that your shell configuration file contains the PATH export line.
Run echo $PYENV_ROOT to confirm the variable is set. If it returns empty, your shell configuration was not loaded. Run source ~/.bashrc (or the appropriate file for your shell) or restart your terminal entirely with exec "$SHELL".
Problem: pyenv Not Switching Python Versions
If pyenv global or pyenv local seems to have no effect, the most likely cause is that the shim initialization line is missing from your shell configuration. Run which python and check whether the output starts with ~/.pyenv/shims. If it points to /usr/bin/python or similar, the shims are not being loaded.
Add eval "$(pyenv init -)" to your shell configuration and restart. Another common cause is a virtual environment that is currently active, which overrides pyenv’s version selection. Run pyenv deactivate or deactivate and try again.
Problem: Build Takes Extremely Long or Hangs
Python compilation is CPU-intensive, but it should not hang indefinitely. If your build seems stuck, check available memory. Compiling Python with limited RAM, especially on VPS instances with 1 GB or less, can cause the process to stall. Add swap space or compile on a machine with at least 2 GB of RAM.
You can also speed up builds by setting the MAKE_OPTS environment variable to use multiple cores:
export MAKE_OPTS="-j4"
pyenv install 3.12.0
Replace 4 with your CPU core count.
Production Considerations and Best Practices
pyenv is an excellent development tool, but the considerations change when you move to production. Here is how to adapt your workflow for deployment scenarios.
Always Commit the .python-version File
The .python-version file created by pyenv local should be committed to version control. This ensures every developer on the team uses the same Python version. In CI/CD pipelines, you can read this file to determine which Python version to install, making your builds deterministic and reproducible.
Use Docker for Production Runtime
In production, avoid relying on pyenv. Instead, use official Python Docker images that match the version specified in your .python-version file. Docker images are pre-compiled, tested, and optimized for production use. They also include security patches and are maintained by the Python release team.
A typical production Dockerfile starts with FROM python:3.12-slim rather than building Python from source with pyenv. This gives you a consistent, reproducible runtime environment without the overhead of compilation.
Keep Build Dependencies in Development Only
In production containers, install only the runtime dependencies your application needs, not the build tools. Use multi-stage Docker builds to compile dependencies in one stage and copy only the artifacts to a minimal runtime image. This reduces image size and attack surface.
Document Your Setup
Maintain a README or onboarding document that describes the pyenv setup process for new team members. Include the exact build dependency commands for your target distribution, the required Python versions, and any project-specific virtual environment conventions. This saves onboarding time and prevents environment-related bugs.
Frequently Asked Questions
How can I manage multiple Python versions on Linux?
Install pyenv by running curl https://pyenv.run | bash, add the initialization lines to your shell configuration file, install build dependencies for your distribution, then use pyenv install to add Python versions and pyenv global or pyenv local to switch between them. pyenv keeps all versions in your home directory without affecting system Python.
How to maintain multiple Python versions?
Use pyenv global to set a default version, pyenv local to set a project-specific version via a .python-version file, and pyenv shell for temporary per-session overrides. pyenv resolves versions in priority order: shell first, then local, then global, then system Python. Commit the .python-version file to version control so all team members use the same version.
How can I use different Python versions in a virtual environment?
Install pyenv-virtualenv, then create environment-specific virtual environments with pyenv virtualenv 3.12.0 myproject-env. Each virtual environment is tied to a specific Python version. Activate with pyenv activate myproject-env, or set it as the local version with pyenv local myproject-env for automatic activation when entering the project directory.
What is the difference between pyenv and venv?
pyenv manages Python interpreter versions, letting you install and switch between multiple Python releases. venv creates isolated package environments for a single already-installed Python version but cannot install new Python versions. They solve different problems: pyenv handles version management, venv handles dependency isolation. Using both together gives you version control and package isolation.
Why should I use pyenv instead of system Python?
System Python is managed by your distribution and may be required by system utilities. Modifying or upgrading it can break your operating system. pyenv installs Python versions in your user directory without touching system files, giving you the freedom to install any version and switch between them safely.
How do I fix pyenv build failed errors?
Most build failures are caused by missing build dependencies. Install the full set of development libraries including libssl-dev, zlib1g-dev, libbz2-dev, libreadline-dev, libffi-dev, and build-essential. Check the build log in /tmp/python-build.*.log for the specific error. Common fixes include installing OpenSSL development headers and ensuring at least 2 GB of available RAM during compilation.
Conclusion
Managing multiple Python versions on Linux does not have to be a constant source of frustration. With pyenv handling version management and pyenv-virtualenv providing isolated environments, you get a clean, professional setup that keeps system Python untouched while giving every project its own Python version and dependency space.
The workflow I recommend is simple. Install pyenv and build dependencies, configure your shell, set a global default Python version, then use pyenv local with virtual environments for each project. Commit the .python-version file to version control. This approach scales from a single developer working on side projects to entire teams maintaining dozens of services across different Python versions.
For production, switch to Docker with official Python images rather than relying on pyenv at runtime. The development environment is where pyenv’s flexibility matters most; production benefits from reproducibility and pre-built images. If you run into build failures, remember that nearly every issue traces back to missing dependencies, so start there and check the build log.
Now that you know how to manage multiple Python versions on Linux with pyenv and virtual environments, set up your first project with a dedicated Python version and isolated environment. The initial setup takes about thirty minutes, and it will save you countless hours of debugging version conflicts down the road.