
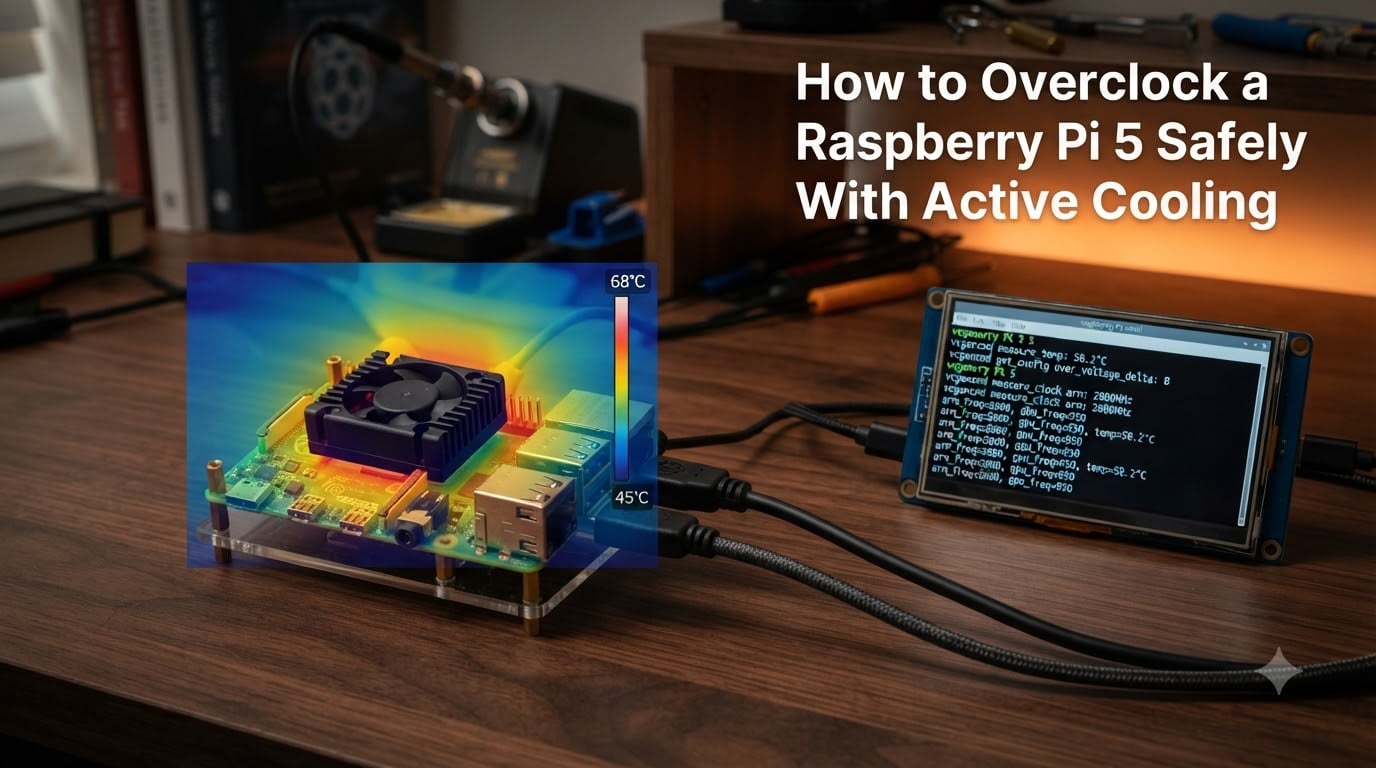
Overclocking a Raspberry Pi 5 means pushing the BCM2712 CPU beyond its stock 2.4GHz default to extract more performance for emulation, AI, or server workloads. Active cooling is MANDATORY for any overclock attempt, and you must edit config.txt, choose a safe voltage, and run long stability tests before trusting the new speed. In this guide I walk through the exact process I use on my own Pi 5, from safety disclaimers and silicon lottery expectations to recovery procedures if your board refuses to boot.
By the end you will know how to safely overclock a Raspberry Pi 5 with active cooling, how to monitor thermals with vcgencmd, and how to recover if a setting goes wrong. I assume you have Raspberry Pi OS Bookworm or later installed and basic comfort with the command line.
Table of Contents
Safety Disclaimer and Warranty Notice
Overclocking your Raspberry Pi 5 will void the official warranty. The Raspberry Pi Foundation explicitly warns that running the SoC outside its tested parameters can reduce component lifespan, cause data corruption, or in rare cases damage the board.
You also accept that any overclock can result in an unbootable system. I keep a spare SD card and a backup of /boot/firmware/config.txt on every Pi 5 I tune, and I strongly recommend you do the same before changing any frequency or voltage parameter.
Three non-negotiable rules before you start. Use a quality 5V 5A USB-C power supply from a trusted brand. Keep your board under active cooling at all times. And never raise over_voltage_delta above 8 unless you have a thermal camera and time to spare.
Does the Raspberry Pi 5 Need Active Cooling for Overclocking?
Yes, the Raspberry Pi 5 absolutely needs active cooling for any sustained overclock. The BCM2712 SoC uses Cortex-A76 cores that throttle aggressively at 85°C, and stock clocks already push the chip into the high 70s without a cooler.
At 2.4GHz stock, the Pi 5 will thermal throttle within minutes on a bare board. Once you increase arm_freq to 2.6GHz or higher, you have zero thermal headroom without a fan pushing air across a heatsink. Passive cooling is fine for stock speeds in a well-ventilated case, but it is not enough for any overclock.
My rule of thumb is simple. If you cannot hear or feel airflow coming from your Pi 5, do not overclock it. The official Raspberry Pi Active Cooler, the Argon ONE V3, and any 40mm PWM fan mounted over a heatsink will all keep the SoC under 70°C at 2.8GHz.
Prerequisites and Hardware Checklist
Before editing a single file, gather the hardware and software that make a safe overclock possible. Skipping any of these is how people end up with corrupted SD cards and unstable systems.
- Raspberry Pi 5 (any RAM size, though 8GB is the most common).
- Official Active Cooler or compatible PWM fan plus heatsink.
- 5V 5A USB-C power supply (the official 27W PSU is the safest choice).
- MicroSD card or NVMe SSD with Raspberry Pi OS Bookworm or Ubuntu 24.04.
- Backup of /boot/firmware/config.txt stored on a different computer.
- EEPROM firmware updated to the latest stable release.
To update the firmware, run sudo rpi-eeprom-update -a and reboot. The latest EEPROM unlocks higher voltage ranges and modern boot behavior, both of which matter when you push clock speeds past 2.8GHz.
Understanding Silicon Revisions and the Silicon Lottery
Not every Raspberry Pi 5 can hit the same overclock. The same firmware and same voltage can give one board a stable 3.0GHz and another a hard fail at 2.7GHz, and that gap is called the silicon lottery. I learned this the hard way testing four boards from the same batch.
There are two main silicon steppings currently shipping in Pi 5 boards. The C1 stepping is the earlier revision, and the D0 stepping is the newer one with slightly better voltage scaling. Most D0 chips reach 2.8GHz easily, while C1 chips often need a touch more voltage to hit the same speed.
Jeff Geerling tested 10 Pi 5 units and found only one ran stable at 3.0GHz. The rest topped out between 2.6 and 2.8GHz. Treat 2.4GHz as the efficiency sweet spot, 2.8GHz as a realistic daily target, and 3.0GHz as a bonus if your specific chip is lucky. Do not assume your results will match anyone else’s.
config.txt Parameters Explained
Every Raspberry Pi 5 overclock lives in /boot/firmware/config.txt. The file is parsed at boot, so any change requires a reboot to take effect. Here are the four parameters that matter most.
arm_freq sets the CPU frequency in MHz. The stock value is 2400. Most users can safely push this to 2600 or 2800, and lucky chips can reach 3000. The VideoCore VII GPU lives at gpu_freq, which defaults to 910. You can leave it alone for most workloads, though small bumps to 950 help in some emulation scenarios.
over_voltage_delta is the modern parameter for fine voltage control on the Pi 5. It adds microvolts on top of the dynamic voltage and frequency scaling baseline. Values from 1 to 8 are safe, and each step is roughly 25mV. On D0 silicon I usually stop at 4, and on C1 silicon I may push to 6.
force_turbo=1 disables the DVFS scaling that drops voltage at idle. It can help with stability during transient loads, but it sets the warranty bit permanently. I leave it off and use the default dynamic governor unless I have a specific reason to force higher clocks.
Step-by-Step Raspberry Pi 5 Overclocking Procedure
Now to the actual overclock. Follow these steps in order, and do not skip the stability test at the end. Jumping straight to a 3GHz setting is how people corrupt their SD card on day one.
Step 1. Update your system and firmware. Run sudo apt update && sudo apt full-upgrade -y && sudo rpi-eeprom-update -a, then reboot.
Step 2. Back up config.txt. Use sudo cp /boot/firmware/config.txt /boot/firmware/config.txt.bak so you can restore it if anything breaks.
Step 3. Install monitoring tools. Run sudo apt install -y libraspberrypi-bin stress-ng sysbench so you have vcgencmd, stress-ng, and Geekbench dependencies ready.
Step 4. Make a conservative first change. Open /boot/firmware/config.txt with sudo nano /boot/firmware/config.txt and append these lines.
Code block example:
arm_freq=2700
over_voltage_delta=3
gpu_freq=910
Step 5. Save the file, exit nano, and reboot with sudo reboot. Watch the screen carefully. If the Pi boots, you have a workable base. If it does not, jump to the recovery section below.
Step 6. After a successful boot, run vcgencmd measure_temp and confirm the idle temperature is below 45°C. Anything above 50°C idle means your cooler is not seated properly.
Step 7. Run a 30-minute stress test with stress-ng –cpu 4 –timeout 1800 –metrics-brief. If the system survives without warnings in dmesg, you have a stable 2.7GHz. From here you can increase arm_freq by 100MHz at a time and repeat the test.
Stability Testing With Pi-Under-Pressure
The Pi-Under-Pressure tool is the most complete stability test I have found for the Raspberry Pi 5. It combines CPU, GPU, RAM, and I/O stress with a watchdog that reboots the system if it stops responding. A clean 24-hour run is the gold standard for declaring a clock stable.
Install Pi-Under-Pressure by cloning the GitHub repository, running the installer, and starting the full test before you walk away. The script writes a log file you can review later to see any throttling events or crashes you may have missed during interactive use.
Most forums users report that 2.6GHz to 2.8GHz is the realistic range for daily 24/7 use. Speeds above 3.0GHz often pass a 30-minute test but fail overnight. If your Pi 5 will survive a full day of Pi-Under-Pressure, you can trust it for real workloads.
Temperature Monitoring With vcgencmd
vcgencmd is your window into the SoC. It can read temperature, voltage, clock speeds, and throttle status directly from the firmware. I keep a watch loop running on a second terminal during any new overclock test.
Run watch -n 1 vcgencmd measure_temp to see live temperature updates every second. During a stress test, temperatures should stay below 80°C. The Pi 5 throttles at 85°C and shuts down at 90°C, so any reading above 80°C means you need better cooling or a lower clock.
Run vcgencmd get_throttled to decode the throttle flags. A non-zero hex value means the Pi has throttled at some point since boot, and the bits tell you whether it was thermal, under-voltage, or arm frequency capping. Under-voltage throttling in particular is almost always a power supply problem, not a clock problem.
Fan Speed and Cooling Curve Configuration
The official Active Cooler uses PWM and the Pi 5 firmware exposes the control through device tree parameters. You can set the fan to ramp with temperature rather than run at full speed all the time.
Add these lines to config.txt to enable a basic cooling curve. The fan stays quiet at low temps and ramps up only when the SoC needs it.
dtparam=fan_temp0=50000
dtparam=fan_temp1=70000
dtparam=fan_temp2=80000
dtparam=fan_temp3=85000
The values are in millidegrees Celsius. So 50000 means the fan starts ramping at 50°C, and 85000 means it hits full speed at 85°C. Adjust the bottom threshold up if the fan noise bothers you, and down if you want extra thermal headroom for sustained loads.
Cooling Solutions Comparison
The official Raspberry Pi Active Cooler is the easiest option and works well for 2.8GHz and below. It comes pre-applied with thermal paste, mounts with four push pins, and draws power directly from the board.
The Argon ONE V3 case and the Argon THRML 30 cooler are the next step up. They keep the SoC under 65°C at 2.8GHz and look cleaner for a desktop setup. For pure performance, a 40mm Noctua fan on a copper heatsink is hard to beat, but you give up the clean look.
Pure passive cooling works for stock 2.4GHz in a well-ventilated case, but it is not safe for any overclock. If you want silent operation, throttling is the trade-off, and throttling means your expensive clock settings are being ignored anyway.
Recovery Procedure When Your Pi 5 Won’t Boot
The most common overclock mistake is a setting that prevents the Pi from booting. The good news is the Pi 5 boots from the SD card and the EEPROM does not touch config.txt during a fresh boot, so recovery is straightforward.
Step 1. Power off the Pi and remove the SD card. Insert it into another computer.
Step 2. Mount the boot partition and open config.txt in any text editor. Remove or comment out the overclock lines you added.
Step 3. Save the file, unmount the SD card, and reinsert it into the Pi 5. Boot normally.
If the Pi still refuses to boot, the EEPROM itself may be corrupted. Hold the power button while connecting power to force the bootloader into safe mode, then reflash the EEPROM from the recovery SD card image. This is the nuclear option and you should only use it after the SD card fix has failed.
Performance Benchmarks and Real-World Results
At stock 2.4GHz, a Raspberry Pi 5 scores around 770 single-core and 1620 multi-core in Geekbench 6. Push it to a stable 2.8GHz and the same board scores around 880 single-core and 1870 multi-core, a 15% gain on the CPU side.
Real-world gains depend on the workload. Compile times for most projects drop by 10 to 20%. Emulation of N64 and PS1 sees small improvements, but Dreamcast and PSP see almost nothing because the workload is GPU-bound. AI inference with llama.cpp scaling shows the biggest gains, with tokens per second improving by up to 25% at 3.0GHz.
The trade-off is power and heat. A Pi 5 at 3.0GHz draws around 9W under full load compared to 6W at stock. If your workload is already CPU-limited and you have active cooling, the extra power is worth it. If you are bottlenecked elsewhere, the overclock will not help.
Frequently Asked Questions
How can I safely overclock my Raspberry Pi 5?
Update your firmware and EEPROM first, install active cooling, then edit /boot/firmware/config.txt with conservative arm_freq and over_voltage_delta values. Increase by 100MHz at a time and run a 24-hour stability test with Pi-Under-Pressure before trusting the new speed.
Does the Raspberry Pi 5 need active cooling for overclocking?
Yes. Active cooling is mandatory for any overclock above the 2.4GHz stock speed. The BCM2712 SoC will thermal throttle at 85°C without a fan, and passive cooling does not provide enough headroom to sustain frequencies above 2.6GHz.
Is overclocking a Raspberry Pi safe?
Overclocking a Raspberry Pi 5 is safe within tested limits as long as you use active cooling, a quality 5V 5A power supply, and conservative voltage bumps. It does void the official warranty, and pushing over_voltage_delta above 8 or arm_freq above 3000 without proper testing risks data corruption or hardware damage.
Can Raspberry Pi 5 be passively cooled?
Only at stock 2.4GHz in a well-ventilated case. Passive cooling cannot sustain the heat output of any overclock and the Pi 5 will throttle back to base frequencies within minutes under load.
Conclusion and Best Practices Summary
To overclock a Raspberry Pi 5 safely with active cooling, start with a current firmware and a quality 5V 5A power supply, then verify the active cooler is keeping idle temps below 45°C. Edit /boot/firmware/config.txt with conservative arm_freq and over_voltage_delta values, reboot, and run a 24-hour stability test through Pi-Under-Pressure before you trust the new speed.
The realistic daily target for most Pi 5 boards is 2.8GHz with active cooling. If your specific chip happens to be a silicon lottery winner, 3.0GHz is in reach. And if anything goes wrong, the SD card recovery procedure will get you back to a booting system in under five minutes.