
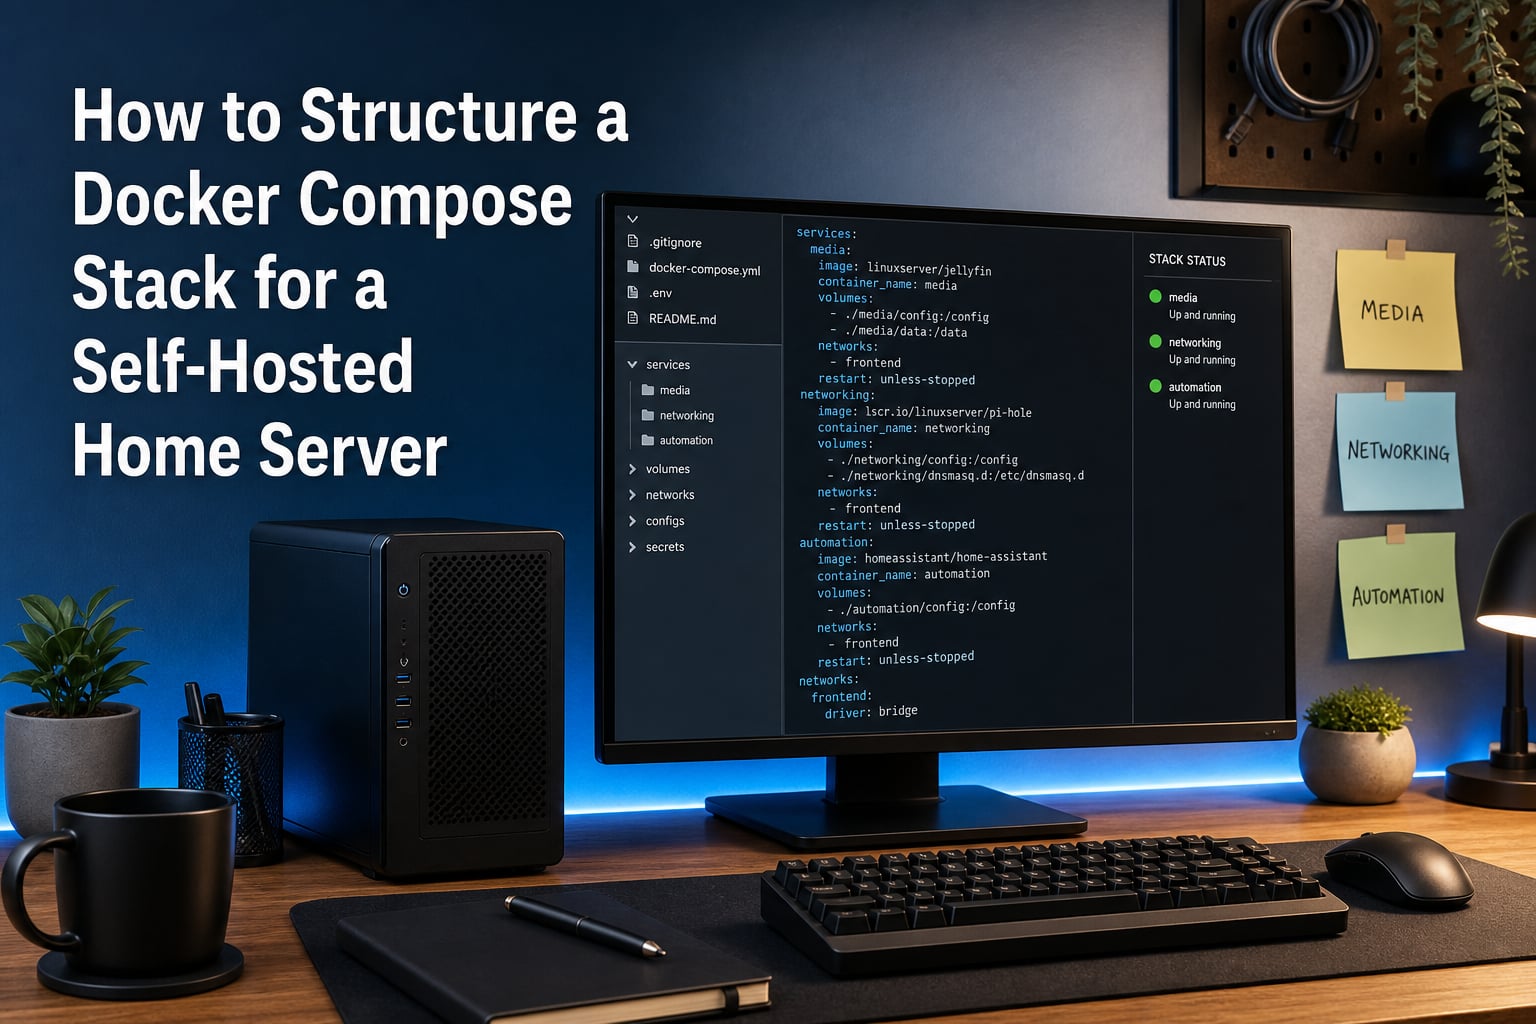
If you have ever typed docker run five times in a row just to bring your media stack back online after a reboot, you already know why the docker compose stack structure matters. I built my first home server the same way — half a dozen containers started individually, scattered environment variables, and a sticky note listing which port Plex used. Within a month I could not reproduce my own setup from scratch.
This guide is the playbook I wish I had on day one. I will show you how to structure a docker compose stack for a self-hosted home server so that every service, network, and volume is declared in plain text, version controlled, and trivially reproducible. By the end you will have a clean directory layout, an annotated docker-compose.yml, a working .env workflow, and a plan for backups, updates, and remote access.
Table of Contents
What Is a Docker Compose Stack and Why Use It for a Self-Hosted Home Server?
A docker compose stack is a single declarative YAML file (usually docker-compose.yml) that defines every container, network, and volume your self-hosted home server needs. Instead of running containers one by one with long docker run commands, you describe your whole stack once and start it with one command.
From Single Containers to Compose Files
The classic docker run workflow gets messy fast. A single Plex container can require a dozen flags for ports, volumes, environment variables, and restart policies. Multiply that by a media server, a reverse proxy, a download client, and a password manager and you have a wall of flags nobody can remember.
Compose replaces those flags with a structured YAML document. Every service lives in the same file, shares a network, and can reference other services by name. When the server reboots, one command brings the entire stack back up in the right order.
Why a Docker Compose Stack Beats docker run Commands
I have run both setups and the difference is night and day. With Compose, my entire home server lives in a Git repository. I clone it onto a new machine, run docker compose up -d, and within minutes I have a working stack identical to the old one. With raw docker run, I would spend a weekend rebuilding it from screenshots.
Compose also gives you a project name, shared networks, and shared volume scoping out of the box. Tools like Portainer, Watchtower, and backup scripts all assume you are using Compose. Adopting a docker compose stack structure is the single biggest upgrade you can make to a self-hosted home server.
How to Structure a Docker Compose Stack: Recommended Directory Layout
The best docker compose stack structure starts with the filesystem. I keep one parent directory called ~/homelab and put every project inside it as a self-contained folder with its own docker-compose.yml, .env, and data/ subdirectory. This project-per-service pattern keeps each stack portable and easy to back up.
The Project-per-Service Pattern
Each project folder owns its configuration, secrets, and persistent data. If I delete the media/ folder I lose Plex, but nothing else. This isolation is a feature, not a bug — it means a broken update in one stack cannot corrupt the others.
For services that always travel together (Plex plus its metadata agents, or Nextcloud plus its database), I keep them in the same project folder and define them as multiple services inside one docker-compose.yml. The rule of thumb: if two containers always start and stop together, they belong in the same stack.
The Monorepo Pattern
Some homelabbers prefer one giant docker-compose.yml at the root and use project names to scope it. I tried this once and regretted it. Bringing down the whole stack to update one service is annoying, and one bad volume mapping can wipe out unrelated data.
The project-per-service pattern wins for most home servers. It scales linearly as you add services, plays nicely with Git, and matches how Portainer, systemd, and most backup tools expect to find your stacks.
An Annotated Directory Tree
Here is the layout I use after about three years of self-hosting. Every entry below corresponds to a real stack on my own server.
~/homelab/
├── .env.common            # Shared vars like TZ, PUID, PGID
├── media/
│   ├── docker-compose.yml # Plex, Jellyfin, *arr stack
│   ├── .env               # Media-specific secrets
│   └── data/              # Configs, metadata, libraries
├── automation/
│   ├── docker-compose.yml # Home Assistant, Node-RED
│   └── data/
├── networking/
│   ├── docker-compose.yml # Traefik, Pi-hole, WireGuard
│   └── data/
├── productivity/
│   ├── docker-compose.yml # Nextcloud, Paperless-ngx
│   └── data/
└── ops/
    ├── docker-compose.yml # Portainer, Watchtower, Dozzle
    └── data/
The shared .env.common at the root is loaded automatically by every project that needs it. Time zone, the LinuxServer.io PUID and PGID values, and a timezone string live there so I never repeat them.
The docker-compose.yml File Explained
The docker-compose.yml file is the heart of your docker compose stack structure. It has four top-level keys: services, networks, volumes, and optional configs. Every container is a service, every named volume or network is declared at the bottom, and the whole file is read top to bottom when you run docker compose up.
Services Block
The services block is where you list each container. Each service has a name (used as its DNS hostname inside the compose network), an image to pull, and configuration for ports, volumes, environment, and dependencies. Service names become hostnames, which is why plex in one service can be reached as http://plex:32400 from another container.
Image, Ports, and Volumes
Image pinning is a small habit with a big payoff. I always pin to a specific tag like lscr.io/linuxserver/plex:1.40.0 rather than latest. When an upstream image breaks at 2 AM, I want to know exactly which version I am running.
Ports come in two flavors. The short syntax "32400:32400" binds the host port 32400 to the container port 32400. The long syntax lets you set the bind address, protocol, and mode. For most home servers, the short form is fine.
Restart Policies and Health Checks
Every service should declare a restart policy. I default to restart: unless-stopped, which keeps the container running through reboots and Docker restarts but respects a manual docker compose stop. Health checks are equally important — they let Docker mark a container as unhealthy and, with tools like deunhealth, restart it automatically.
Complete Annotated Example
Here is a real docker-compose.yml from a Plex media stack with comments stripped for brevity. This is what a clean docker compose stack structure looks like in practice.
services:
  plex:
    image: lscr.io/linuxserver/plex:1.40.0
    container_name: plex
    restart: unless-stopped
    environment:
      - PUID=${PUID}
      - PGID=${PGID}
      - TZ=${TZ}
    ports:
      - "32400:32400"
    volumes:
      - ./data/config:/config
      - /mnt/media/movies:/data/movies
      - /mnt/media/tv:/data/tv
    networks:
      - media_net
    healthcheck:
      test: ["CMD", "curl", "-fsS", "http://localhost:32400/web/index.html"]
      interval: 30s
      timeout: 10s
      retries: 3

  sonarr:
    image: lscr.io/linuxserver/sonarr:4.0.9
    container_name: sonarr
    restart: unless-stopped
    environment:
      - PUID=${PUID}
      - PGID=${PGID}
      - TZ=${TZ}
    volumes:
      - ./data/sonarr:/config
      - /mnt/media:/data
    ports:
      - "8989:8989"
    networks:
      - media_net
    depends_on:
      plex:
        condition: service_healthy

networks:
  media_net:
    driver: bridge
Notice how Sonarr waits for Plex to be healthy before starting. That depends_on with condition: service_healthy clause is the kind of detail that turns a fragile pile of containers into a real docker compose stack.
Environment Variables and the .env File
Environment variables are how you keep your docker-compose.yml portable across machines. Compose automatically reads a file called .env in the same directory as your YAML and substitutes values like ${PUID}. This lets you commit your compose file to Git without leaking secrets.
Why Use a .env File
I learned this the hard way after pushing an API key to a public GitHub repo. Anything sensitive — database passwords, API tokens, domain names — belongs in .env, which I add to .gitignore on day one. The compose file stays in version control; the secrets stay local.
For values that are the same on every machine (your user ID, group ID, time zone), I use a shared ~/.homelab/.env.common and reference it with the env_file directive. This avoids duplicating the same line in every stack.
PUID and PGID for Permissions
LinuxServer.io images use two magic variables: PUID and PGID. They control the user and group inside the container, which determines who owns your volumes on the host. If you skip them you get the classic “permission denied” wall when a container tries to write to a bind mount.
The fix is simple. Find your host user’s UID and GID with id, then set them in .env.common:
PUID=1000
PGID=1000
TZ=America/New_York
Now every LinuxServer container in your stack uses the same UID, your files end up owned by you, and volume permission headaches disappear.
Secrets Management
For anything more sensitive than a port number, I use Docker secrets. The secrets: block in Compose mounts a file from /run/secrets/ inside the container instead of an environment variable, which keeps it out of process listings and logs. Most home servers do not need this, but it is worth knowing for stacks that handle real passwords.
Volume and Data Persistence Best Practices
Volumes are the part of a docker compose stack structure that people get wrong most often. A container is ephemeral — when you delete it, everything inside is gone. Volumes are how you keep the important bits (config, databases, media libraries) alive across container restarts and image updates.
Named Volumes vs Bind Mounts
Named volumes are managed entirely by Docker. You declare them at the bottom of your compose file and Docker stores the data in its own directory, usually under /var/lib/docker/volumes/. They are fast, portable, and survive docker compose down without losing data.
Bind mounts point at a specific path on the host, like ./data/plex:/config. They are easy to back up with rsync, easy to inspect with normal Unix tools, and easy to point at a NAS share. For most home servers, bind mounts are the better choice because they make backups and migrations simple.
Where to Store Persistent Data
I keep application config inside each project folder under data/, and large media files on a separate ZFS or MergerFS mount like /mnt/media/. This split lets me back up configs cheaply while letting media files live on big spinning disks.
If you only have one disk, you can still use bind mounts — just point them at /mnt/storage/<project>/ instead of ./data/. The directory structure on the host matters less than the principle: never store critical data inside a container.
Permissions and Ownership
When bind mounts misbehave, the culprit is almost always UID and GID. The container’s internal user (driven by PUID and PGID) writes files as that UID, and if the host directory is owned by a different user, writes fail. Run chown -R 1000:1000 ./data once and the problem usually vanishes.
Network Configuration for Containers
By default, every Compose project gets its own bridge network, and every service inside it can reach every other service by name. This is one of the quiet superpowers of a well-designed docker compose stack structure — no more memorizing container IP addresses.
Bridge Networks and Container DNS
When you define networks: media_net at the bottom of your compose file and attach every service to it, Docker’s embedded DNS server makes container names resolvable inside the network. Your Plex container can talk to Sonarr at http://sonarr:8989 with no static IPs and no port forwarding between them.
Exposing Ports Safely
The cardinal rule of self-hosted networking is: do not expose ports you do not have to. Every port you publish on 0.0.0.0 is a port an attacker can probe. For services that only need to talk to other containers, omit the ports: block entirely and let them communicate over the internal network.
For services you need to reach from outside (Plex, Nextcloud, your reverse proxy), keep the port mappings but bind them to a reverse proxy and never to a raw container. Traefik and Caddy both auto-discover services through Docker labels, which is the cleanest pattern for a docker compose stack.
Reverse Proxies with Traefik or Caddy
Traefik and Caddy are the two reverse proxies I see most often in the r/selfhosted community. Traefik is more powerful and more complex. Caddy is simpler and has automatic HTTPS through Let’s Encrypt. Either one will route external requests to the right container by hostname.
A typical Traefik service in your compose file declares itself as the entrypoint, then each downstream service gets a traefik.http.routers.<name>.rule label. The result is a single externally facing port (443) that fans out to as many internal services as you want, all with valid TLS certificates.
How to Organize Multiple Docker Compose Projects?
Once your home server grows past five or six stacks, organization becomes the hard part. I run about 14 stacks across 9 project folders, and the system that keeps them sane is one folder per logical domain plus a Git repo tracking all the YAML and env templates.
One Stack per Domain
I group stacks by what they do, not by what software they use. All my media tools live in media/. All my home automation lives in automation/. All my network plumbing (reverse proxy, DNS, VPN) lives in networking/. This matches how I think about the server and makes it easy to take the whole media stack offline without touching anything else.
Portainer Stacks for Visual Management
Portainer is the closest thing the self-hosted community has to a graphical Docker dashboard. Its Stacks feature lets you paste a compose file in a web UI, deploy it with one click, and see the status of every service at a glance. I run Portainer itself as a stack inside ops/ so the tool managing the other tools is also under version control.
For headless servers, Portainer is invaluable. I manage my parents’ Plex server from across the country through it. When a container crashes, I see it before they do, and the restart button is one click away.
Git-Based Configuration
The single best upgrade I made to my docker compose stack structure was putting it in a private Git repository. Every docker-compose.yml, every .env.example template, and every backup script lives there. When I want to try something risky, I make a branch. When it works, I merge. When my disk died last year, I restored the entire server from Git plus my offsite backups in under three hours.
Backup Strategies for Docker Volumes
Containers are disposable; volumes are not. The fastest way to lose your self-hosted home server is to ignore backups until the day a disk fails or a Compose typo wipes out the wrong volume.
Why Container Data Is Fragile
Volumes look like ordinary directories, which makes them easy to forget. But a single docker volume prune or an incorrect compose file with a misnamed volume can erase data you thought was safe. Treat every volume as if it were the only copy.
Simple Volume Backup Scripts
The simplest reliable backup is a cron job that tars each bind mount into a dated archive and ships it somewhere offsite. I run a script called backup-stacks.sh nightly that walks every project folder, tars its data/ directory, and rsyncs the result to a remote server over Tailscale.
For named volumes, the --volumes-from trick still works: run an alpine container with the volume mounted, tar the contents out, and copy them to your backup location.
Offsite and Scheduled Backups
Local backups are not enough. A fire, flood, or ransomware attack takes them too. I keep two offsite copies — one on a friend’s server reached over Tailscale, and one on encrypted cloud storage through rclone. The 3-2-1 rule (three copies, two media, one offsite) applies even to a home server.
Automatic Updates and Monitoring
Once your docker compose stack structure is solid, the next job is keeping it healthy. I run two lightweight services for this and nothing more.
Watchtower for Auto-Updates
Watchtower watches running containers, checks Docker Hub for new image tags, and recreates containers with the new image automatically. I run it with notifications to Discord and a quiet schedule so updates happen overnight. About 90 percent of my image bumps are transparent.
I exclude a few critical stacks (Plex, my reverse proxy) from auto-updates and update those manually after reading release notes. Pinning your image tags, as I mentioned earlier, makes this manual process predictable.
Health Probes and Uptime Monitoring
Docker’s built-in health checks are the foundation. I pair them with deunhealth, which restarts containers whose health checks fail, and a tiny Uptime Kuma stack that pings every service and emails me if anything goes down. Together they catch most issues before I notice.
Security Considerations for a Self-Hosted Stack
A docker compose stack on a home server is one misconfigured port away from the public internet. Treat security as part of the structure, not an afterthought.
Tailscale and WireGuard for Remote Access
The single best thing I did for security was delete my port forwards and install Tailscale. Tailscale creates a WireGuard-based mesh VPN that makes every device on your tailnet reachable as if it were on your home LAN, with zero exposed ports. My phone, laptop, and parents’ TV all reach Plex and Nextcloud through Tailscale and nothing else.
If you prefer a self-hosted option, run a WireGuard container in the networking/ stack. It takes more setup but you keep the keys yourself.
Avoiding Public Port Exposure
Every service you expose directly to the internet is a service you have to keep patched. With Tailscale in front, I publish almost nothing externally — a single HTTPS port for the reverse proxy, and that is it. The blast radius of a vulnerability drops from “every Plex install on the internet” to “this one container on my LAN”.
If you must expose a service, put it behind a reverse proxy with a real certificate, rate-limit it with Crowdsec or fail2ban, and never, ever expose a database port.
Frequently Asked Questions
How do you manage multiple Docker Compose projects on a self-hosted server?
Use one folder per project inside a parent directory like ~/homelab, with each project owning its own docker-compose.yml, .env, and data folder. Track everything in a private Git repository and manage deployments through Portainer or a simple Makefile.
Should I use one big docker-compose.yml or multiple files?
Use multiple project-scoped compose files. One stack per domain (media, automation, networking) keeps failures isolated, makes backups simpler, and matches how Portainer and systemd expect to find your stacks.
How do I back up Docker volumes?
For bind mounts, tar the host directory into a dated archive and copy it offsite with rsync or rclone. For named volumes, run an alpine container with u002du002dvolumes-from, tar the contents, and store them with your other backups. Follow the 3-2-1 rule.
What is the difference between a bind mount and a named volume?
A bind mount points at an explicit path on the host like ./data/plex:/config, while a named volume is managed by Docker under /var/lib/docker/volumes. Bind mounts are easier to back up and inspect with normal Unix tools, while named volumes are more portable across hosts.
Conclusion
A clean docker compose stack structure turns a self-hosted home server from a fragile pile of containers into a reproducible system you actually trust. Pick the project-per-service directory layout, write an annotated docker-compose.yml with pinned images and health checks, keep secrets in .env, back up your volumes on a schedule, and lock down remote access with Tailscale.
Start small. Pick one service, restructure it with the patterns in this guide, and commit it to Git. Once that feels natural, do the next one. In a few weekends you will have a self-hosted home server you can rebuild from a fresh OS in an afternoon — and that is the point.